
Puppet Pants D.I.Y. Kit Instructions
Welcome.
If you’re here, it’s because you bought a Puppet Pants D.I.Y. Kit - so, first off, thank you very much. I make all of these myself in my garage. The nature of handmade work is that there may be some minor differences in the way your kit looks than the examples pictured here.
Pieces from your kit may have small grey patches. That is Apoxie Sculpt and is filling in a bubble from the casting process. Once it is sanded and painted you won’t know it’s there. Apoxie Sculpt is great if you want to add onto your puppet. Give ‘em extra fingers, or a long and narrow chin. Horns? Go for it. Apoxie Sculpt is great!
Pieces from your kit might not be as white as the plastic pieces in these pictures. It will work just as well! It’s just a different proprietary blend of liquid plastic.
The eye screw (the “neck”might be oriented differently, this is correlating to the orientation of the wire that runs through the head and into the control bar. Your head should come aligned with the wire… this will make more sense as we go through these steps. A video will be made soon!
PLEASE CONTACT ME IF YOU ARE STUCK, NEED HELP, REPLACEMENT PARTS, ETC.
This is a new pursuit for me so if you notice things in this guide that are missing, would be helpful to have, etc, please let me know. It would be much appreciated! Email me at puppetpantsproductions@gmail.com
Yes, this DIY kit is unpainted and unsanded - it is truly yours to create as you see fit. These instructions are meant to be a guide. There is no right or wrong way to make a puppet, but here’s how I would suggest starting to think about making yours. Feel free to use everything I’ve provided or add your own changes. It is your world!
Kit Contents
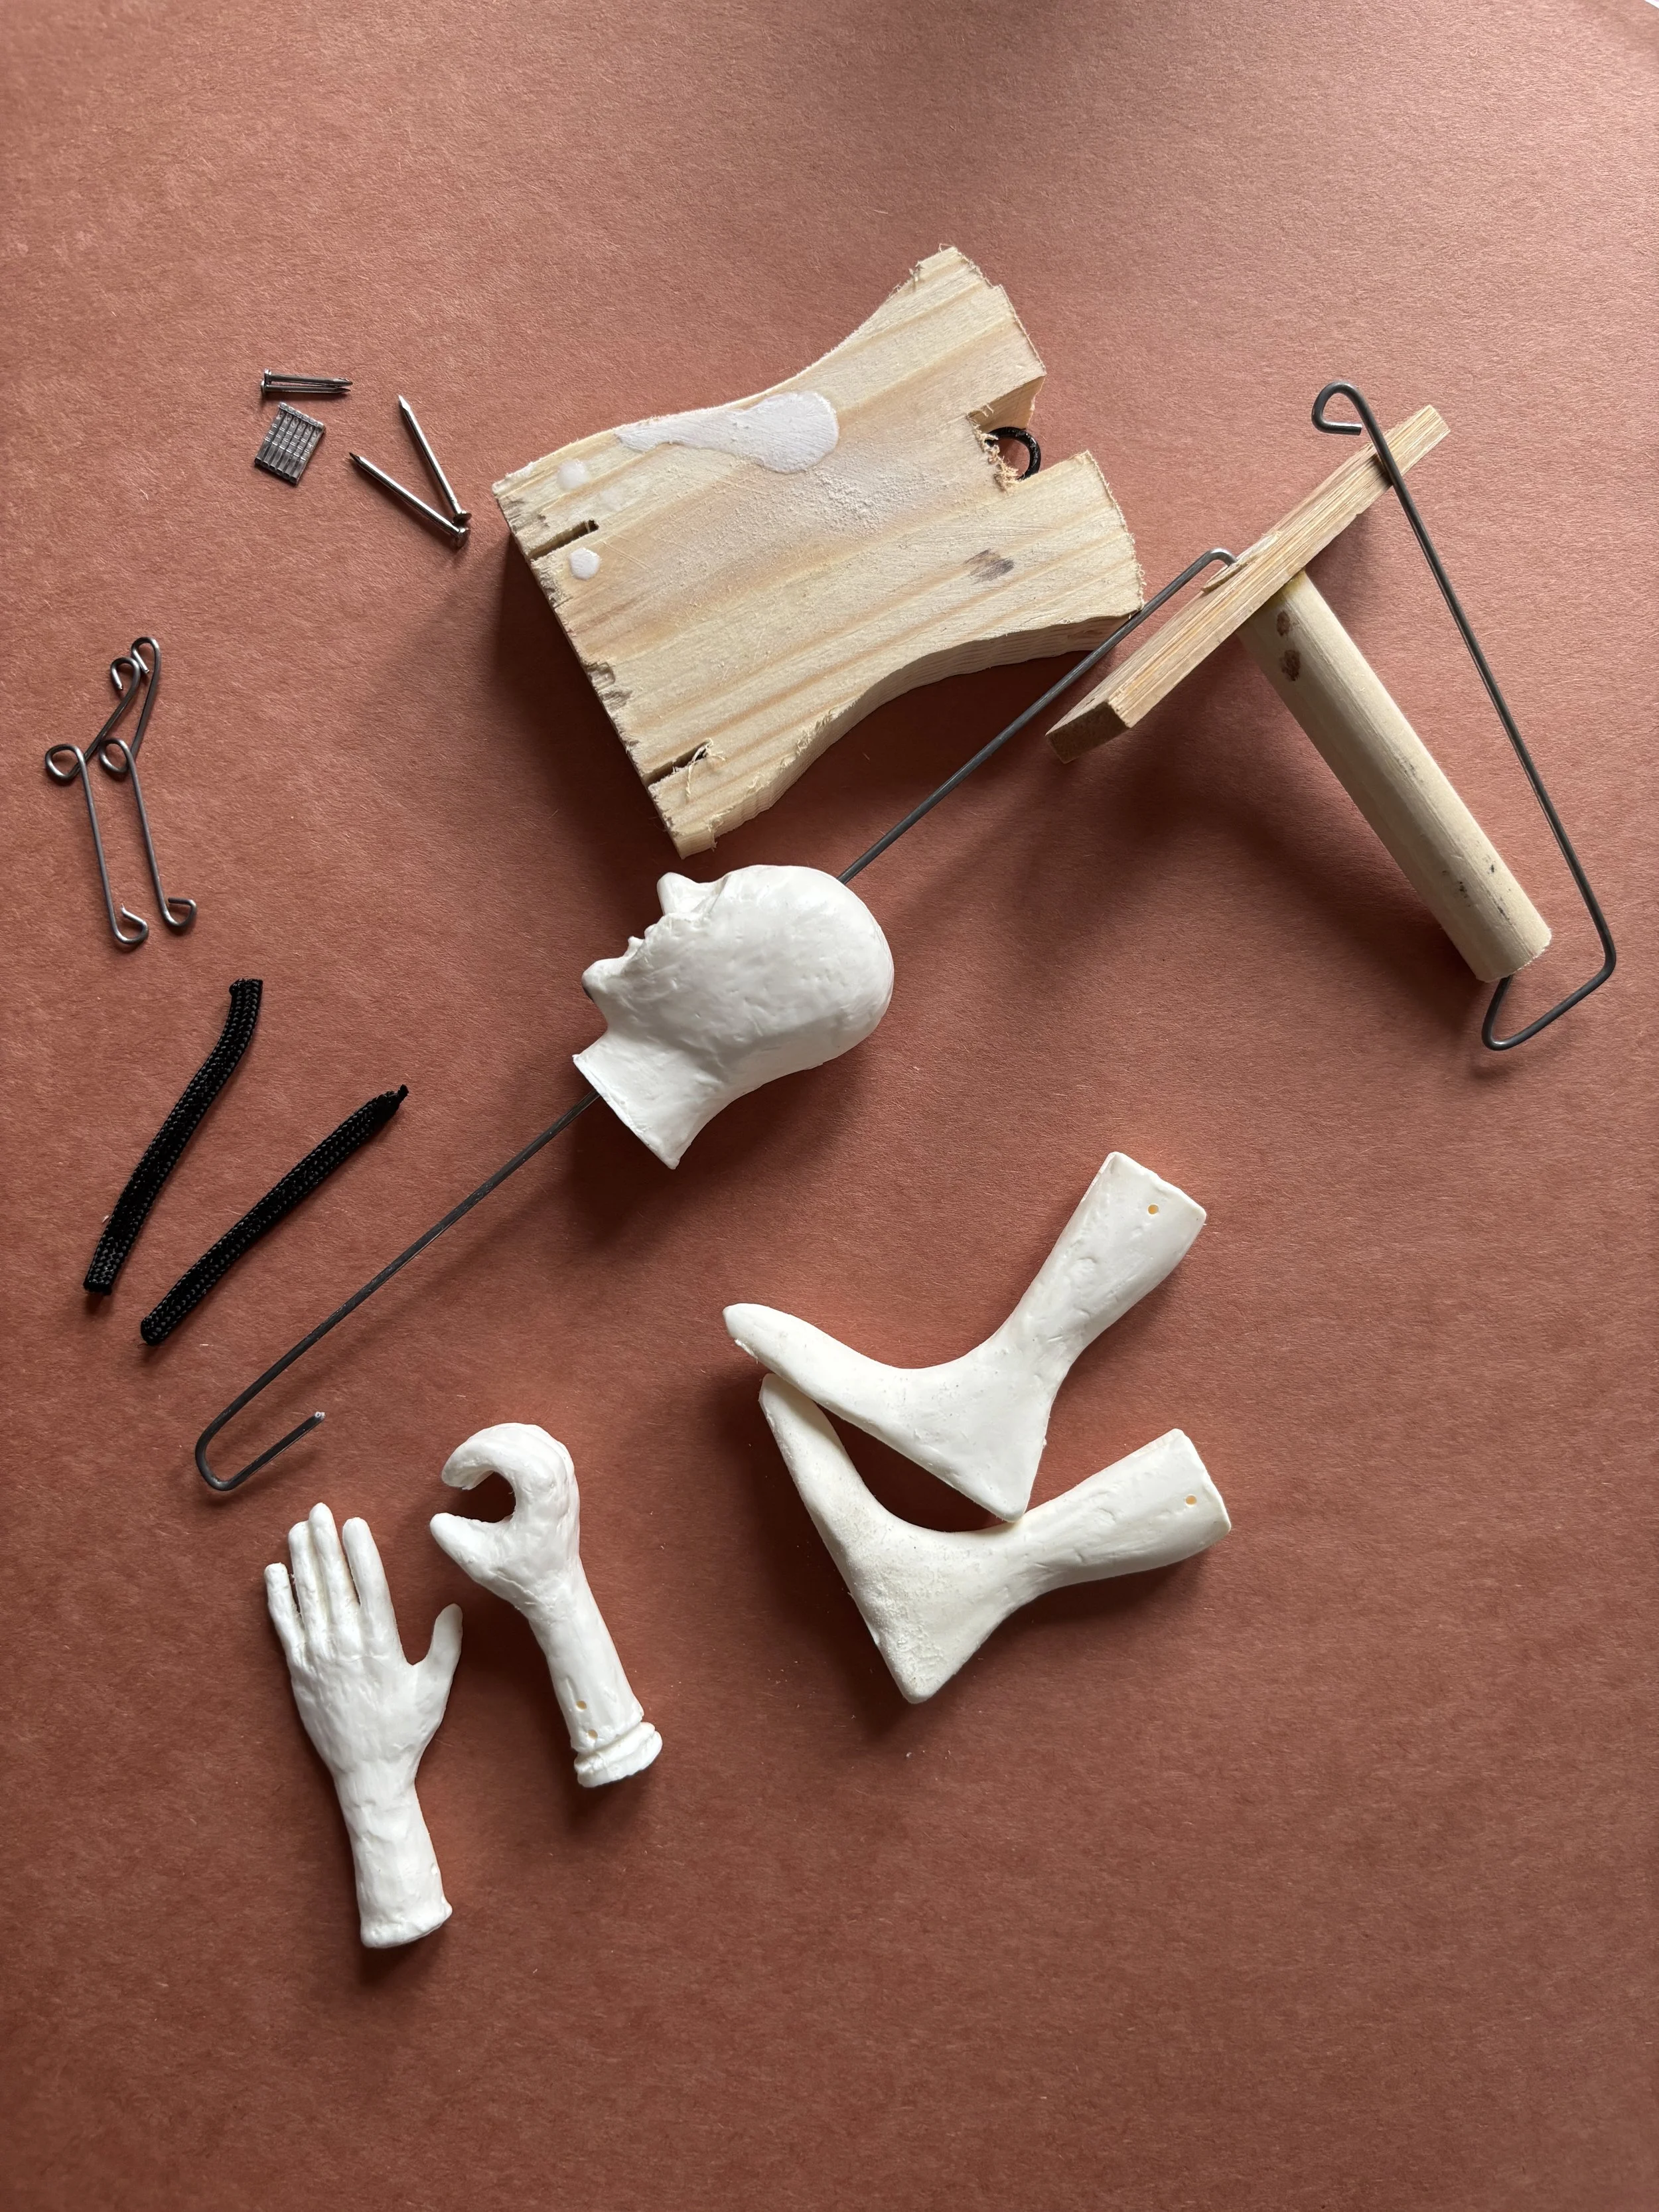
If you ordered a kit to assemble yourself, here is a list of everything in this package:
Head, 2 hands, 2 and feet
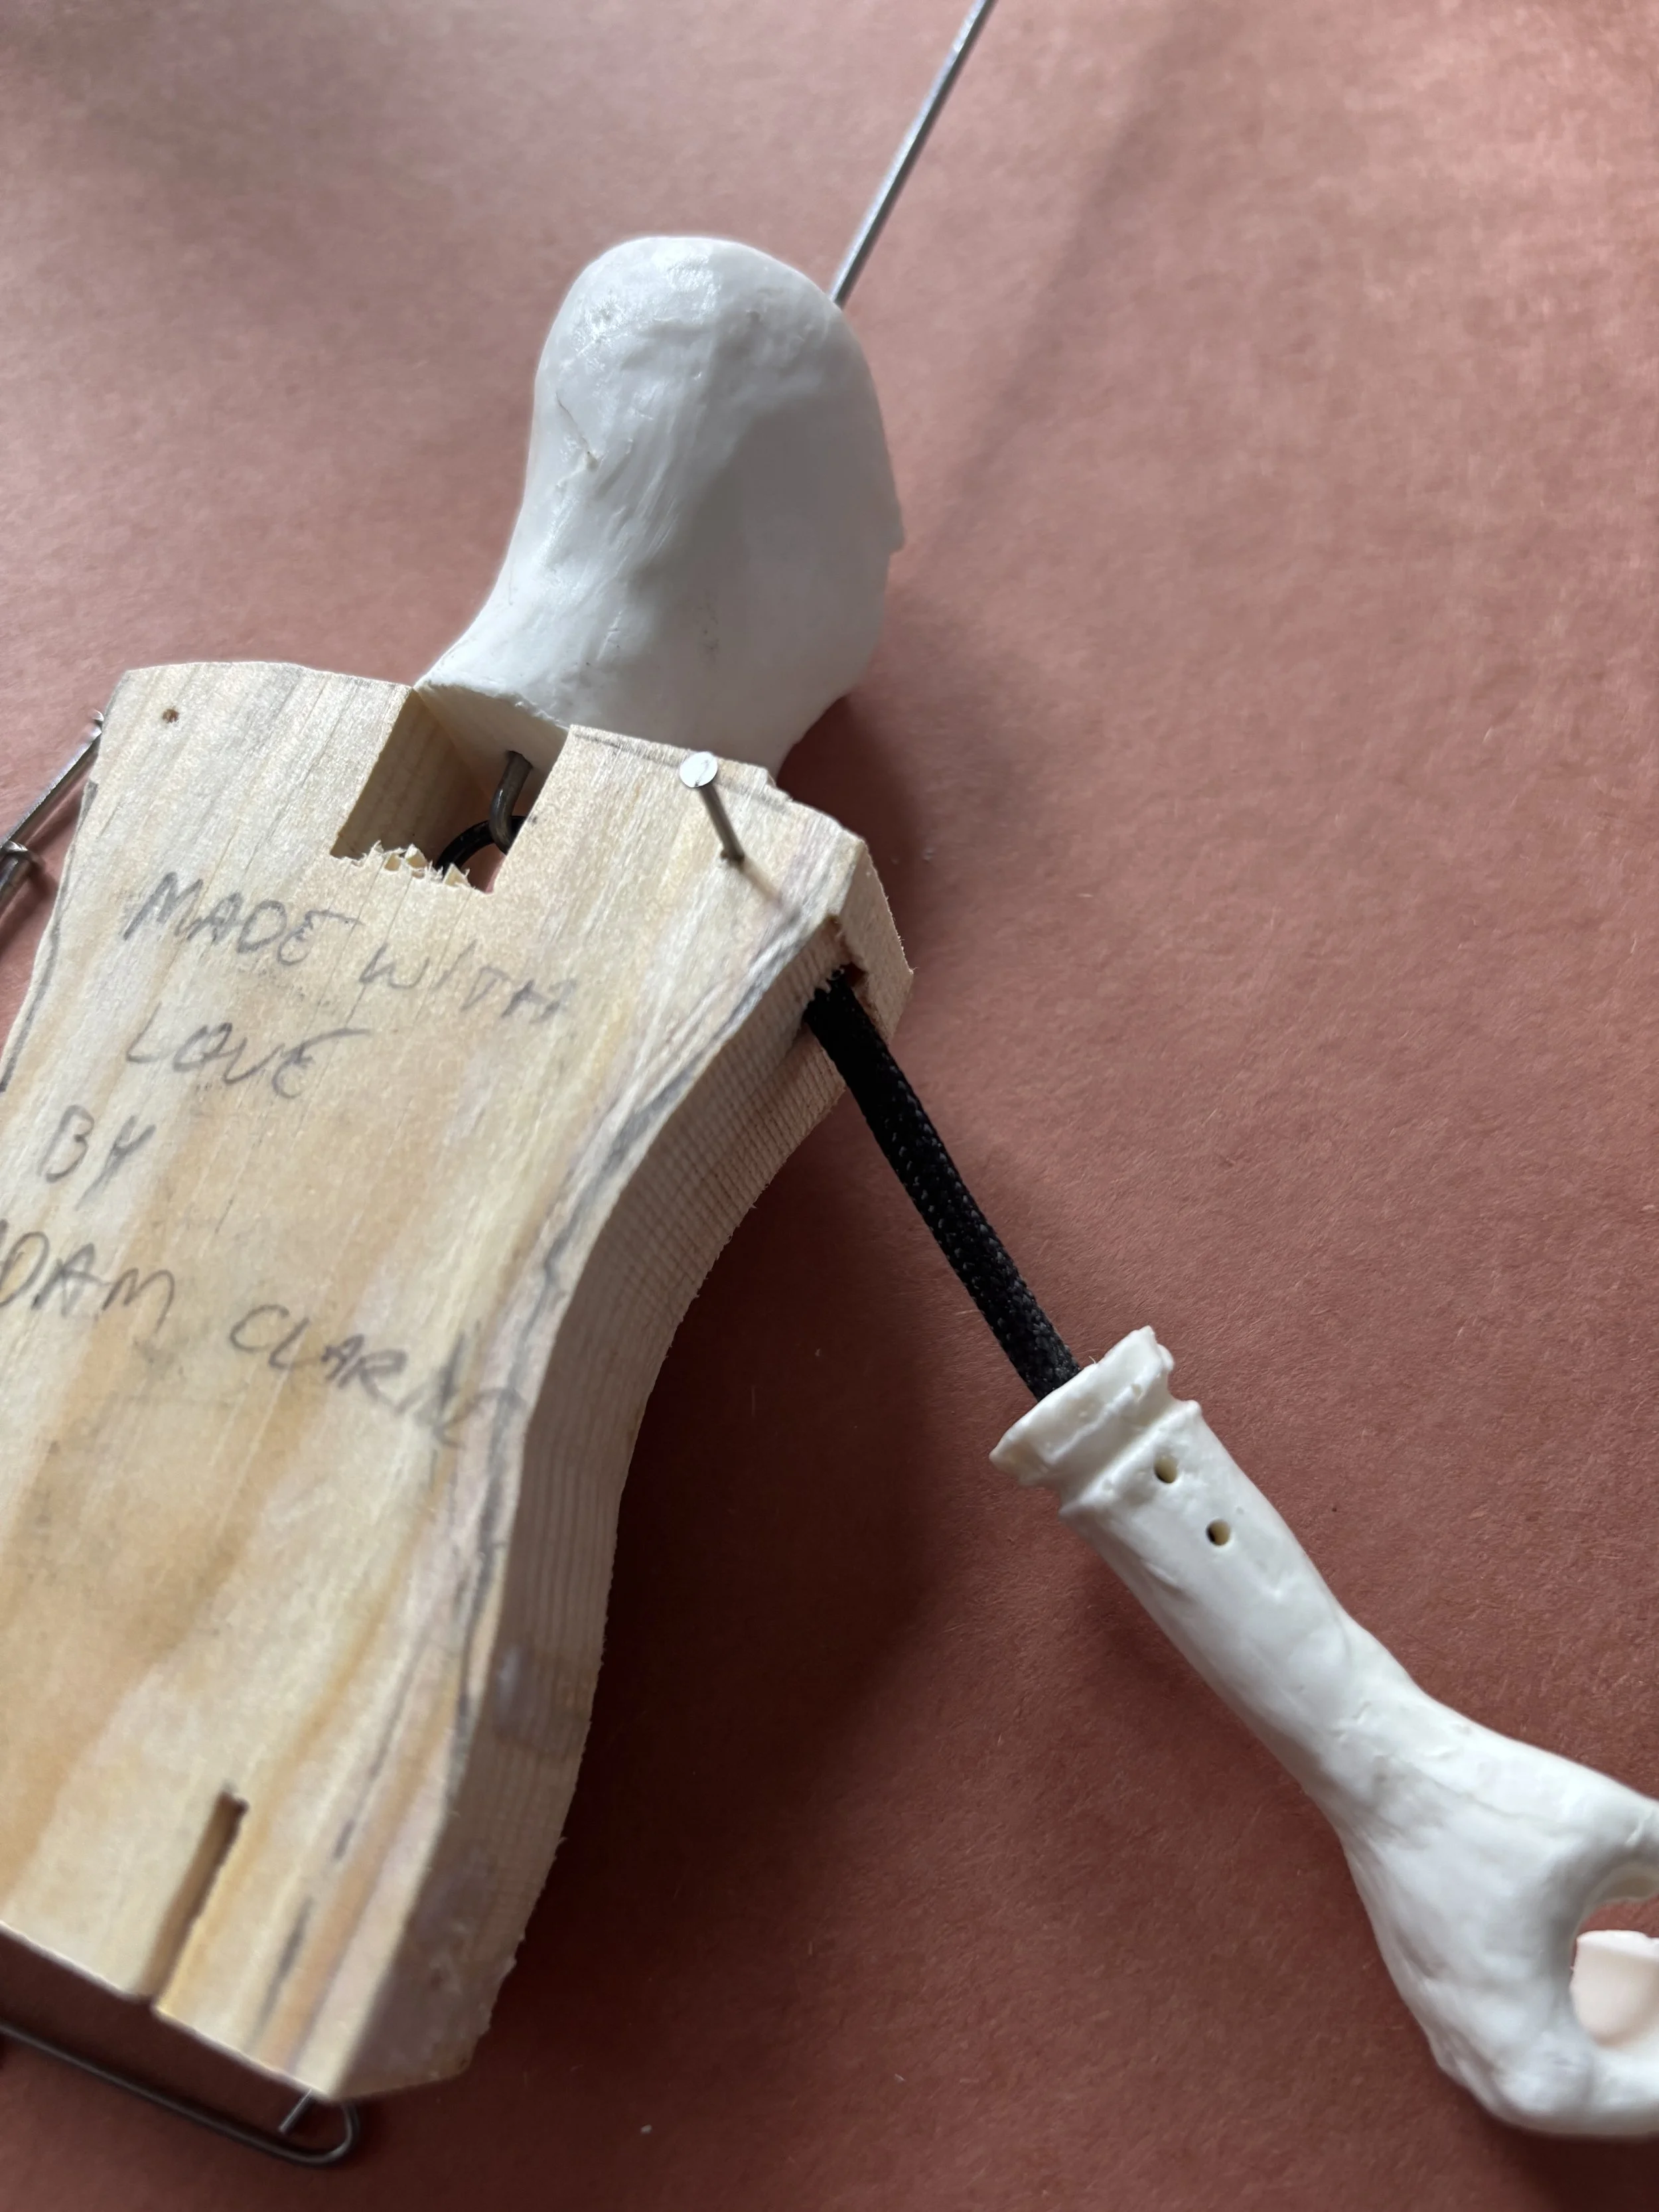
Torso
2 pieces of wire (0.039” diameter- I’m telling you this specific detail in case you want to make new thighs)
2 lengths of rope
2 7/8” nails
4 1/2” nails
Small pins
Screw Eye
Wooden control bar with wire (wire is 1/8” diameter - I am telling you this detail in case you ever need or want to replace this wire)
And here is a list of some of the small tools you will need:
Hammer
Glue (any kind, really.. I prefer super glue or E600, we are not using this to hold anything in place, but rather, to keep the ends of the rope from fraying
Sandpaper
Painting/decorating supplies, costume cloth, etc
Needle nose pliers
Scissors
Sewing needle
Thread
Toothpicks (optional)
Art supplies of your choosing including a sealer to seal the paint on the plastic (optional - will go into details on sealer later)
PREP
You will need to sand and prime your plastic - and wood if you choose. The plastic pieces are really quite soft against a medium grit sandpaper.
The casting process often results in small pieces of plastic “flashing.” I have cut most of the plastic off, but there may be a couple of spots that need to be sanded - mostly the bottom of the feet. To sand the bottom of the feet, I like to put sandpaper on a flat and level surface, then hold the boot on the sandpaper with the bottom of the boot making contact with the grit, and move the boot back and forth with a gentle even pressure. Prime with primer. I like to use Gesso.
Some folks like to use a “Plastic Adhesion Promoter” in this step.
For the torso - you may choose to sand it or keep it as is. I do not think I have ever sanded a body like this because I always cover it in clothes, but it is up to you! Perhaps you want to finely sand and carve and design the body, paint onto it directly, without even making clothes at all.
Once everything is sanded and primed, you’re ready to move on to assembly. **OR YOU CAN CHOOSE TO DECORATE BEFORE ASSEMBLING! This is just how I do it :)
ASSEMBLY
Assembly can be done in any order. In my opinion, any good puppet is built like a building, from the ground up and with the help of tax incentives from politicians with questionable morals.
LEGS
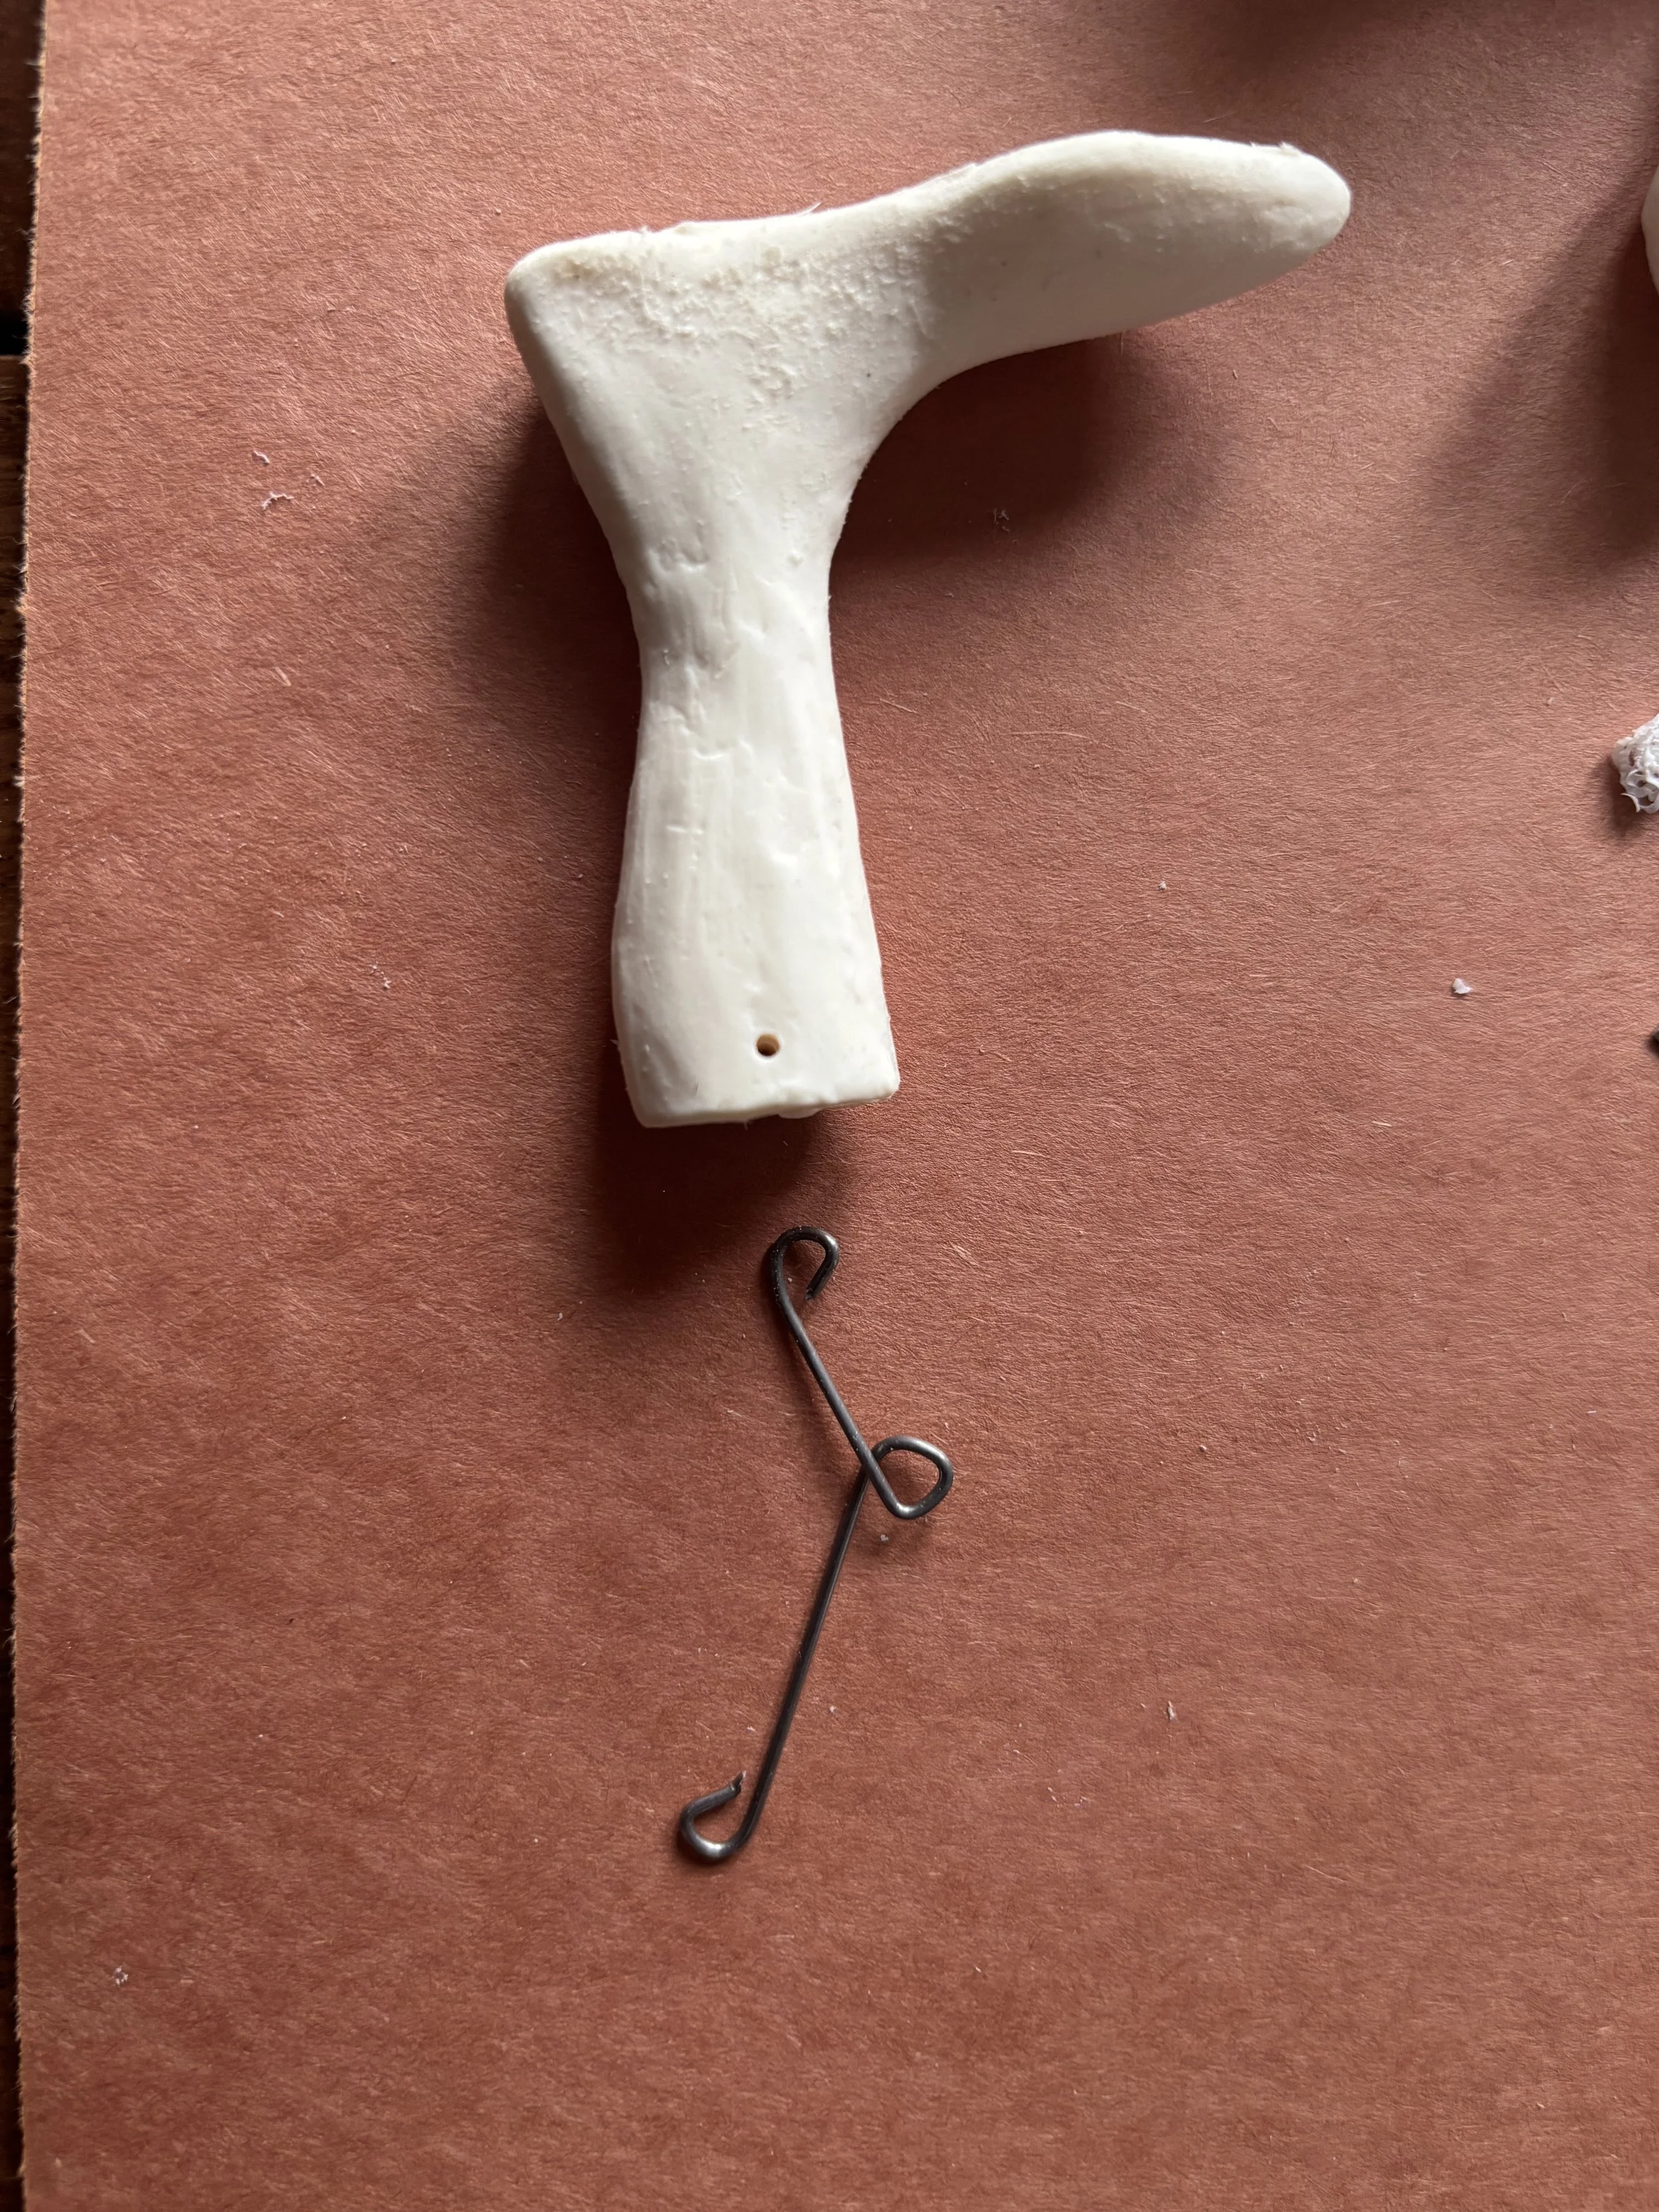
Take your 2 pieces of bent wire. These are your puppet’s thighs. You may notice that there is a wire loop offset from the center of the wire. That offset loop is your puppet’s knee. That means the loop needs to be closer to the boot than it is to the torso. Make sure the loop in the middle of the wire is closest to the boot.
*I have been experimenting with this wire shape and it is possible your loop is located in the center - this should not change the movement of your puppet!
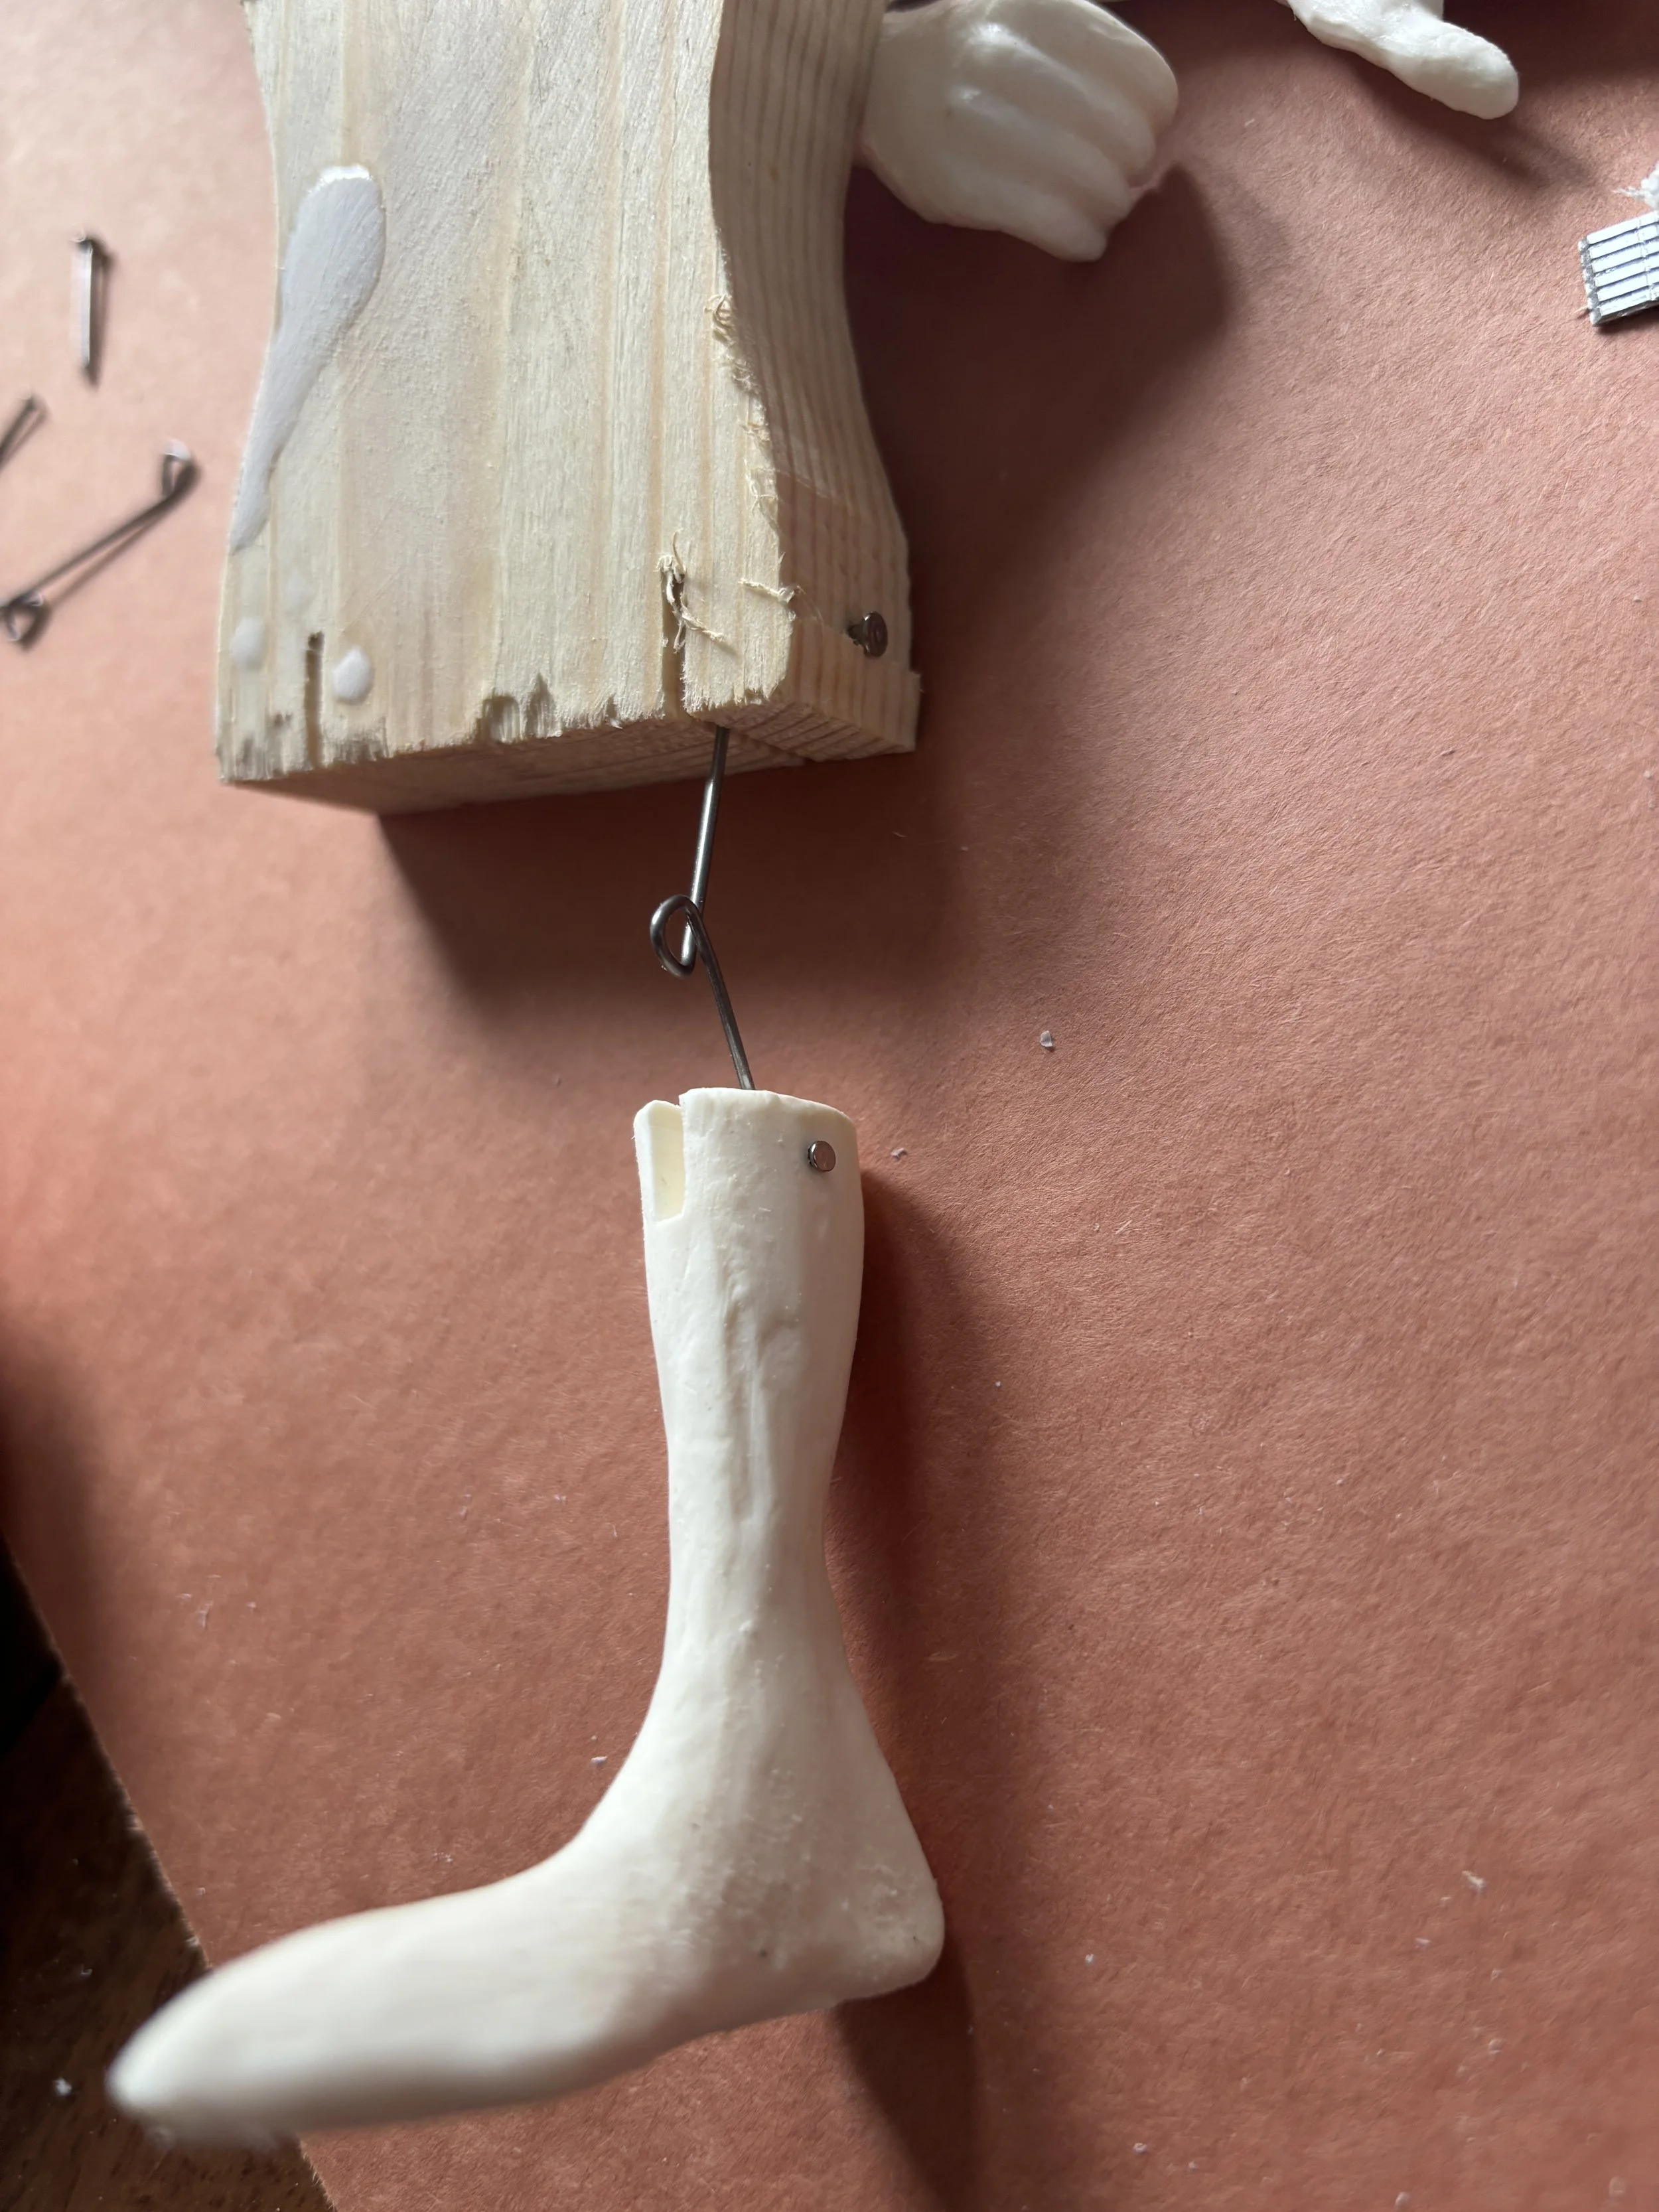
Insert the wire into the slot cut in the boot, and hold it in place with a 1/2” nail through the small hole drilled in the boot. You may need a hammer to gently tap the nail all the way in.
Do this with both boots. You may have noticed that there is no left or right boot. They are the same piece. You may find that the boots, while the exact same, may move differently depending on which side of the puppet you apply them. Experiment and have fun! If you want your puppet to have more of a “toy soldier” type of leg movement, inset small washers in the slots of the knee.
Now insert the still free end of the wire thigh into the torso, and hold in place with a 7/8” nail. You may need a hammer to gently tap the nail all the way in, and you may want to add a small dab of glue to the head of the nail to hold it in place ONCE YOU ARE CERTAIN WITH THE PLACEMENT or you might want to do both! Alternatively, you can place a strip of tape along the outside of the body and over the head of the 7/8” nail to hold it in place.
Make sure you are happy with the movement, you can pull the nails out and make small adjustments to the wire if necessary. I made sure it moved smoothly before it left the workshop, but sometimes things happen in transit.
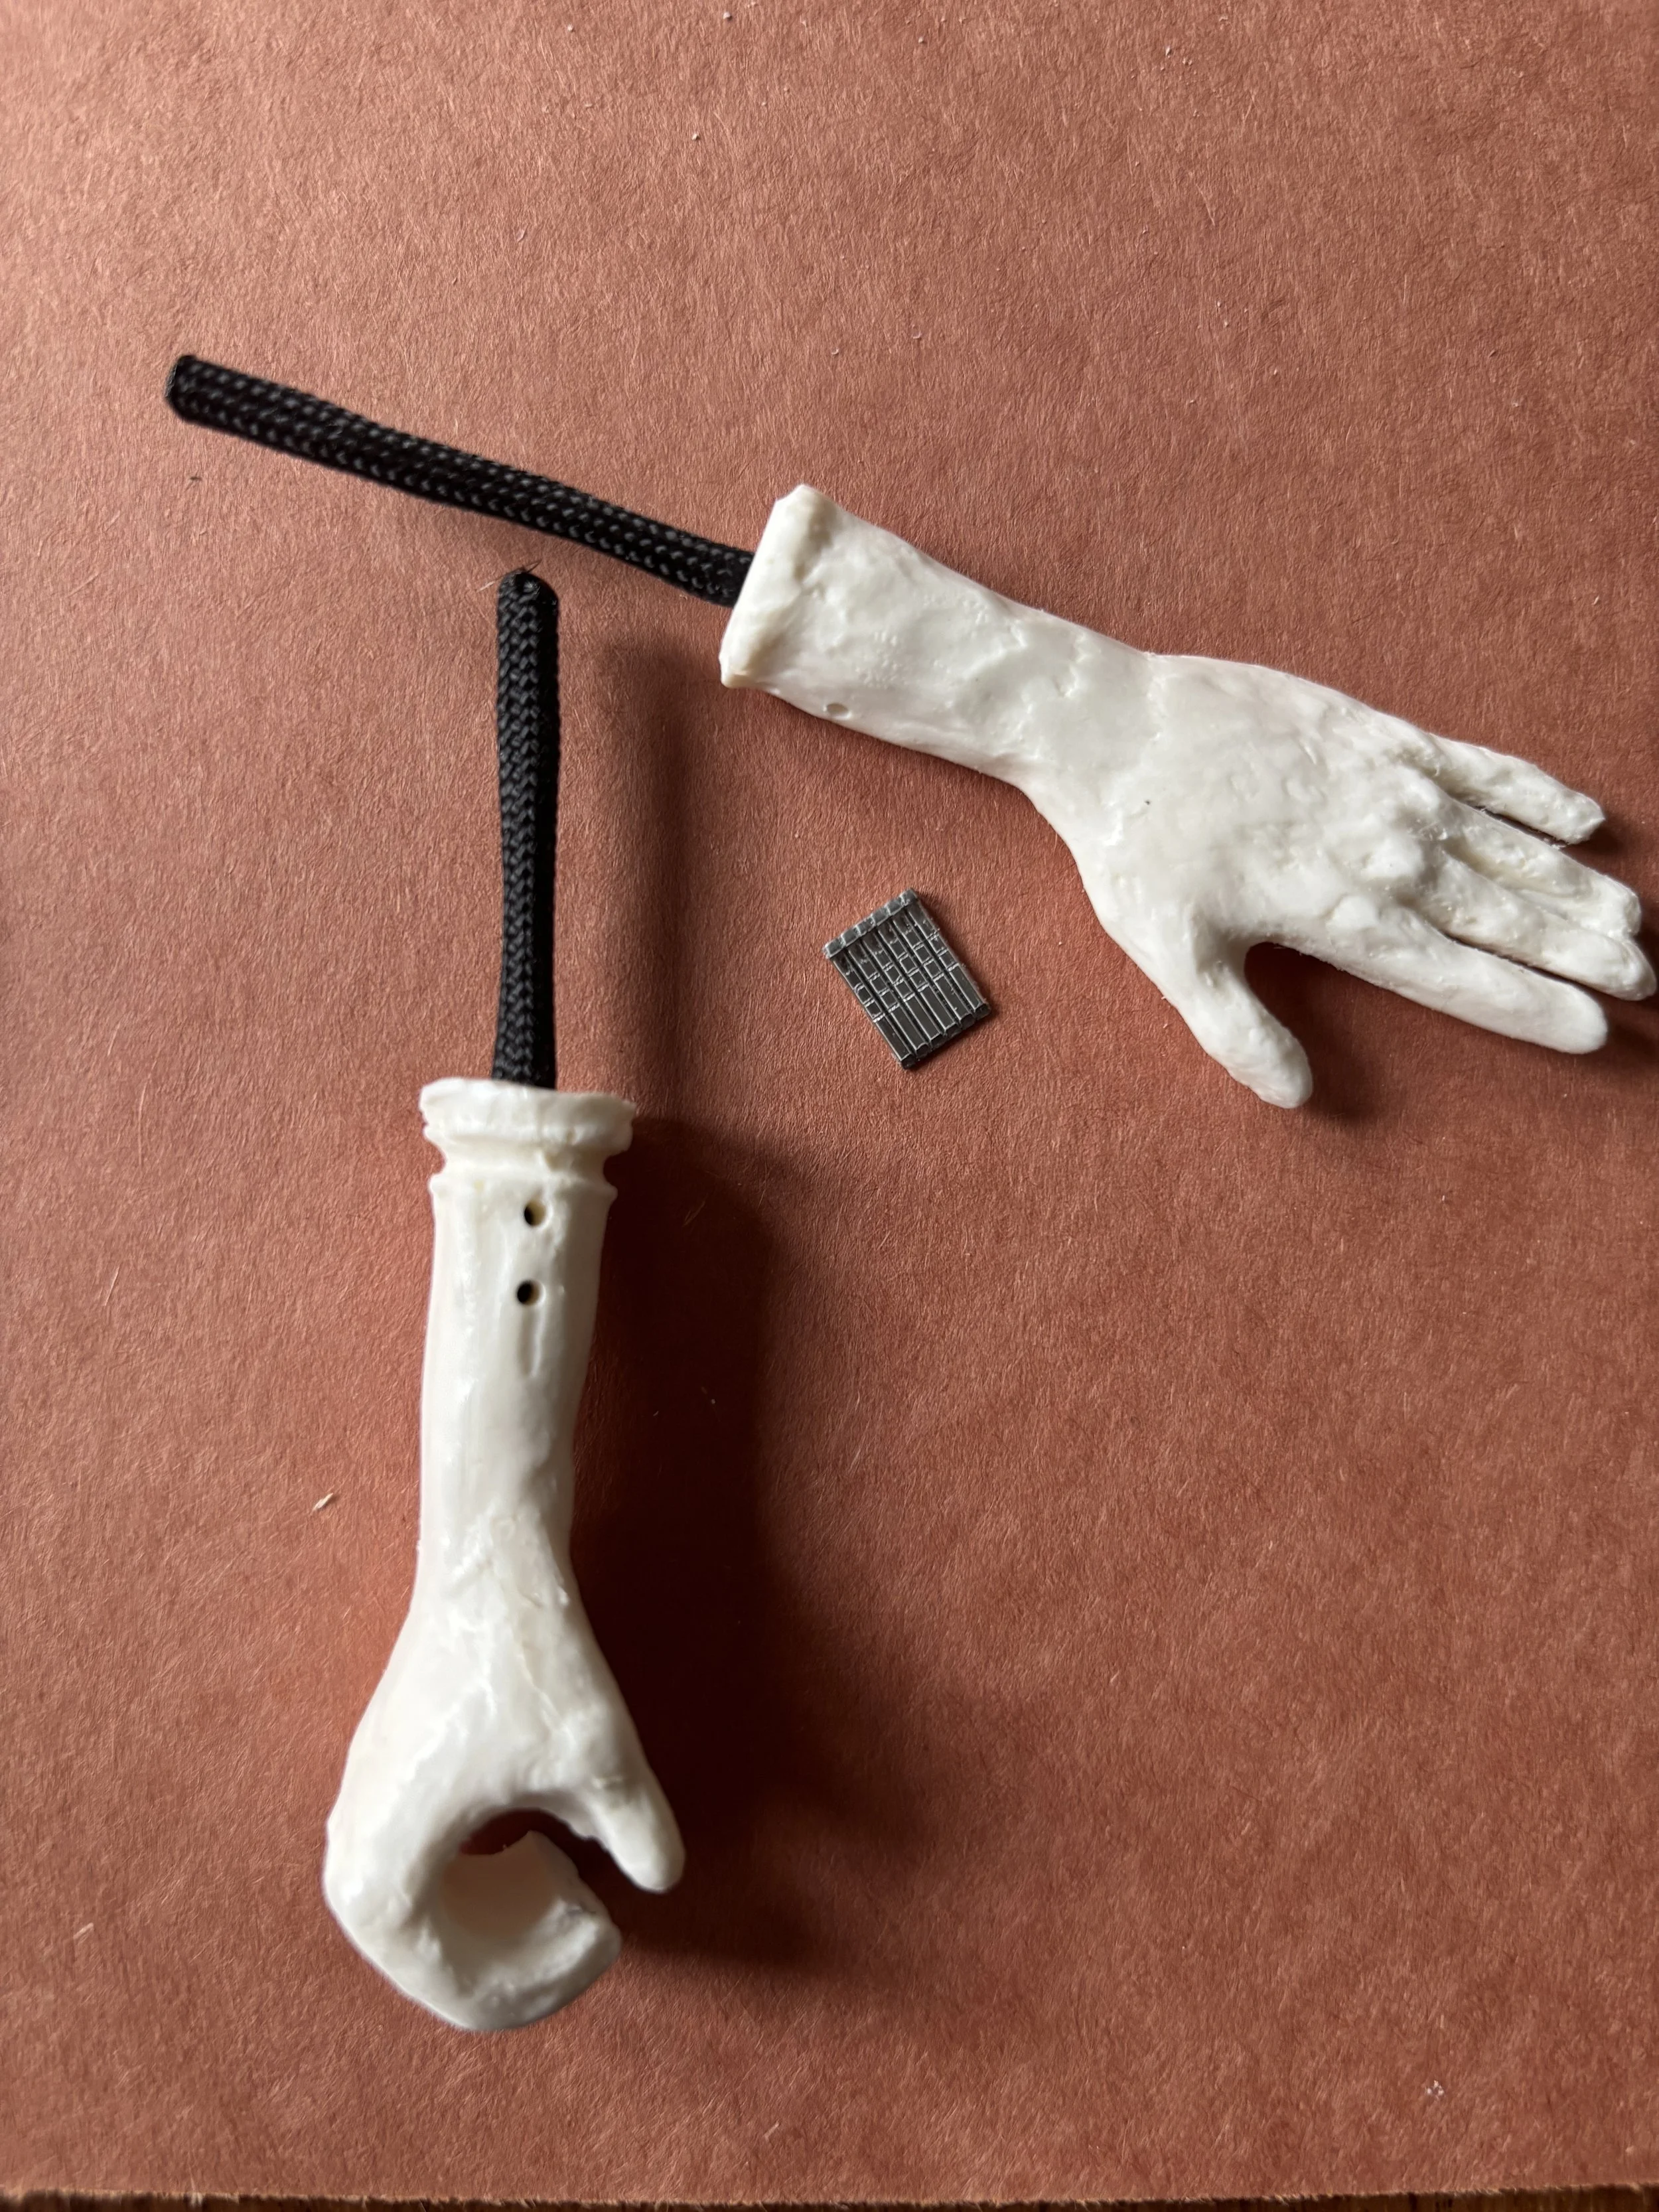
ARMS
Take the rope. This is the upper arm of your puppet. I like to put a dab of E600 on the end of the rope before inserting the rope into the holes drilled in the plastic hands. Play with the depth of your rope until you are satisfied and secure in place with a the teeny tiny pins and some glue. Now do the same with the remaining free side and insert it into the holes drilled in the torso, and secure in place with a 1/2” nail and some glue.
If you want your arms to move differently, you can use leather cord. If you want to make the arms longer, you are free to do so with your own material! The rope I provided is paracord. I like it because you can “cauterize” the ends with a lighter and it keeps the rope from fraying.
HEAD
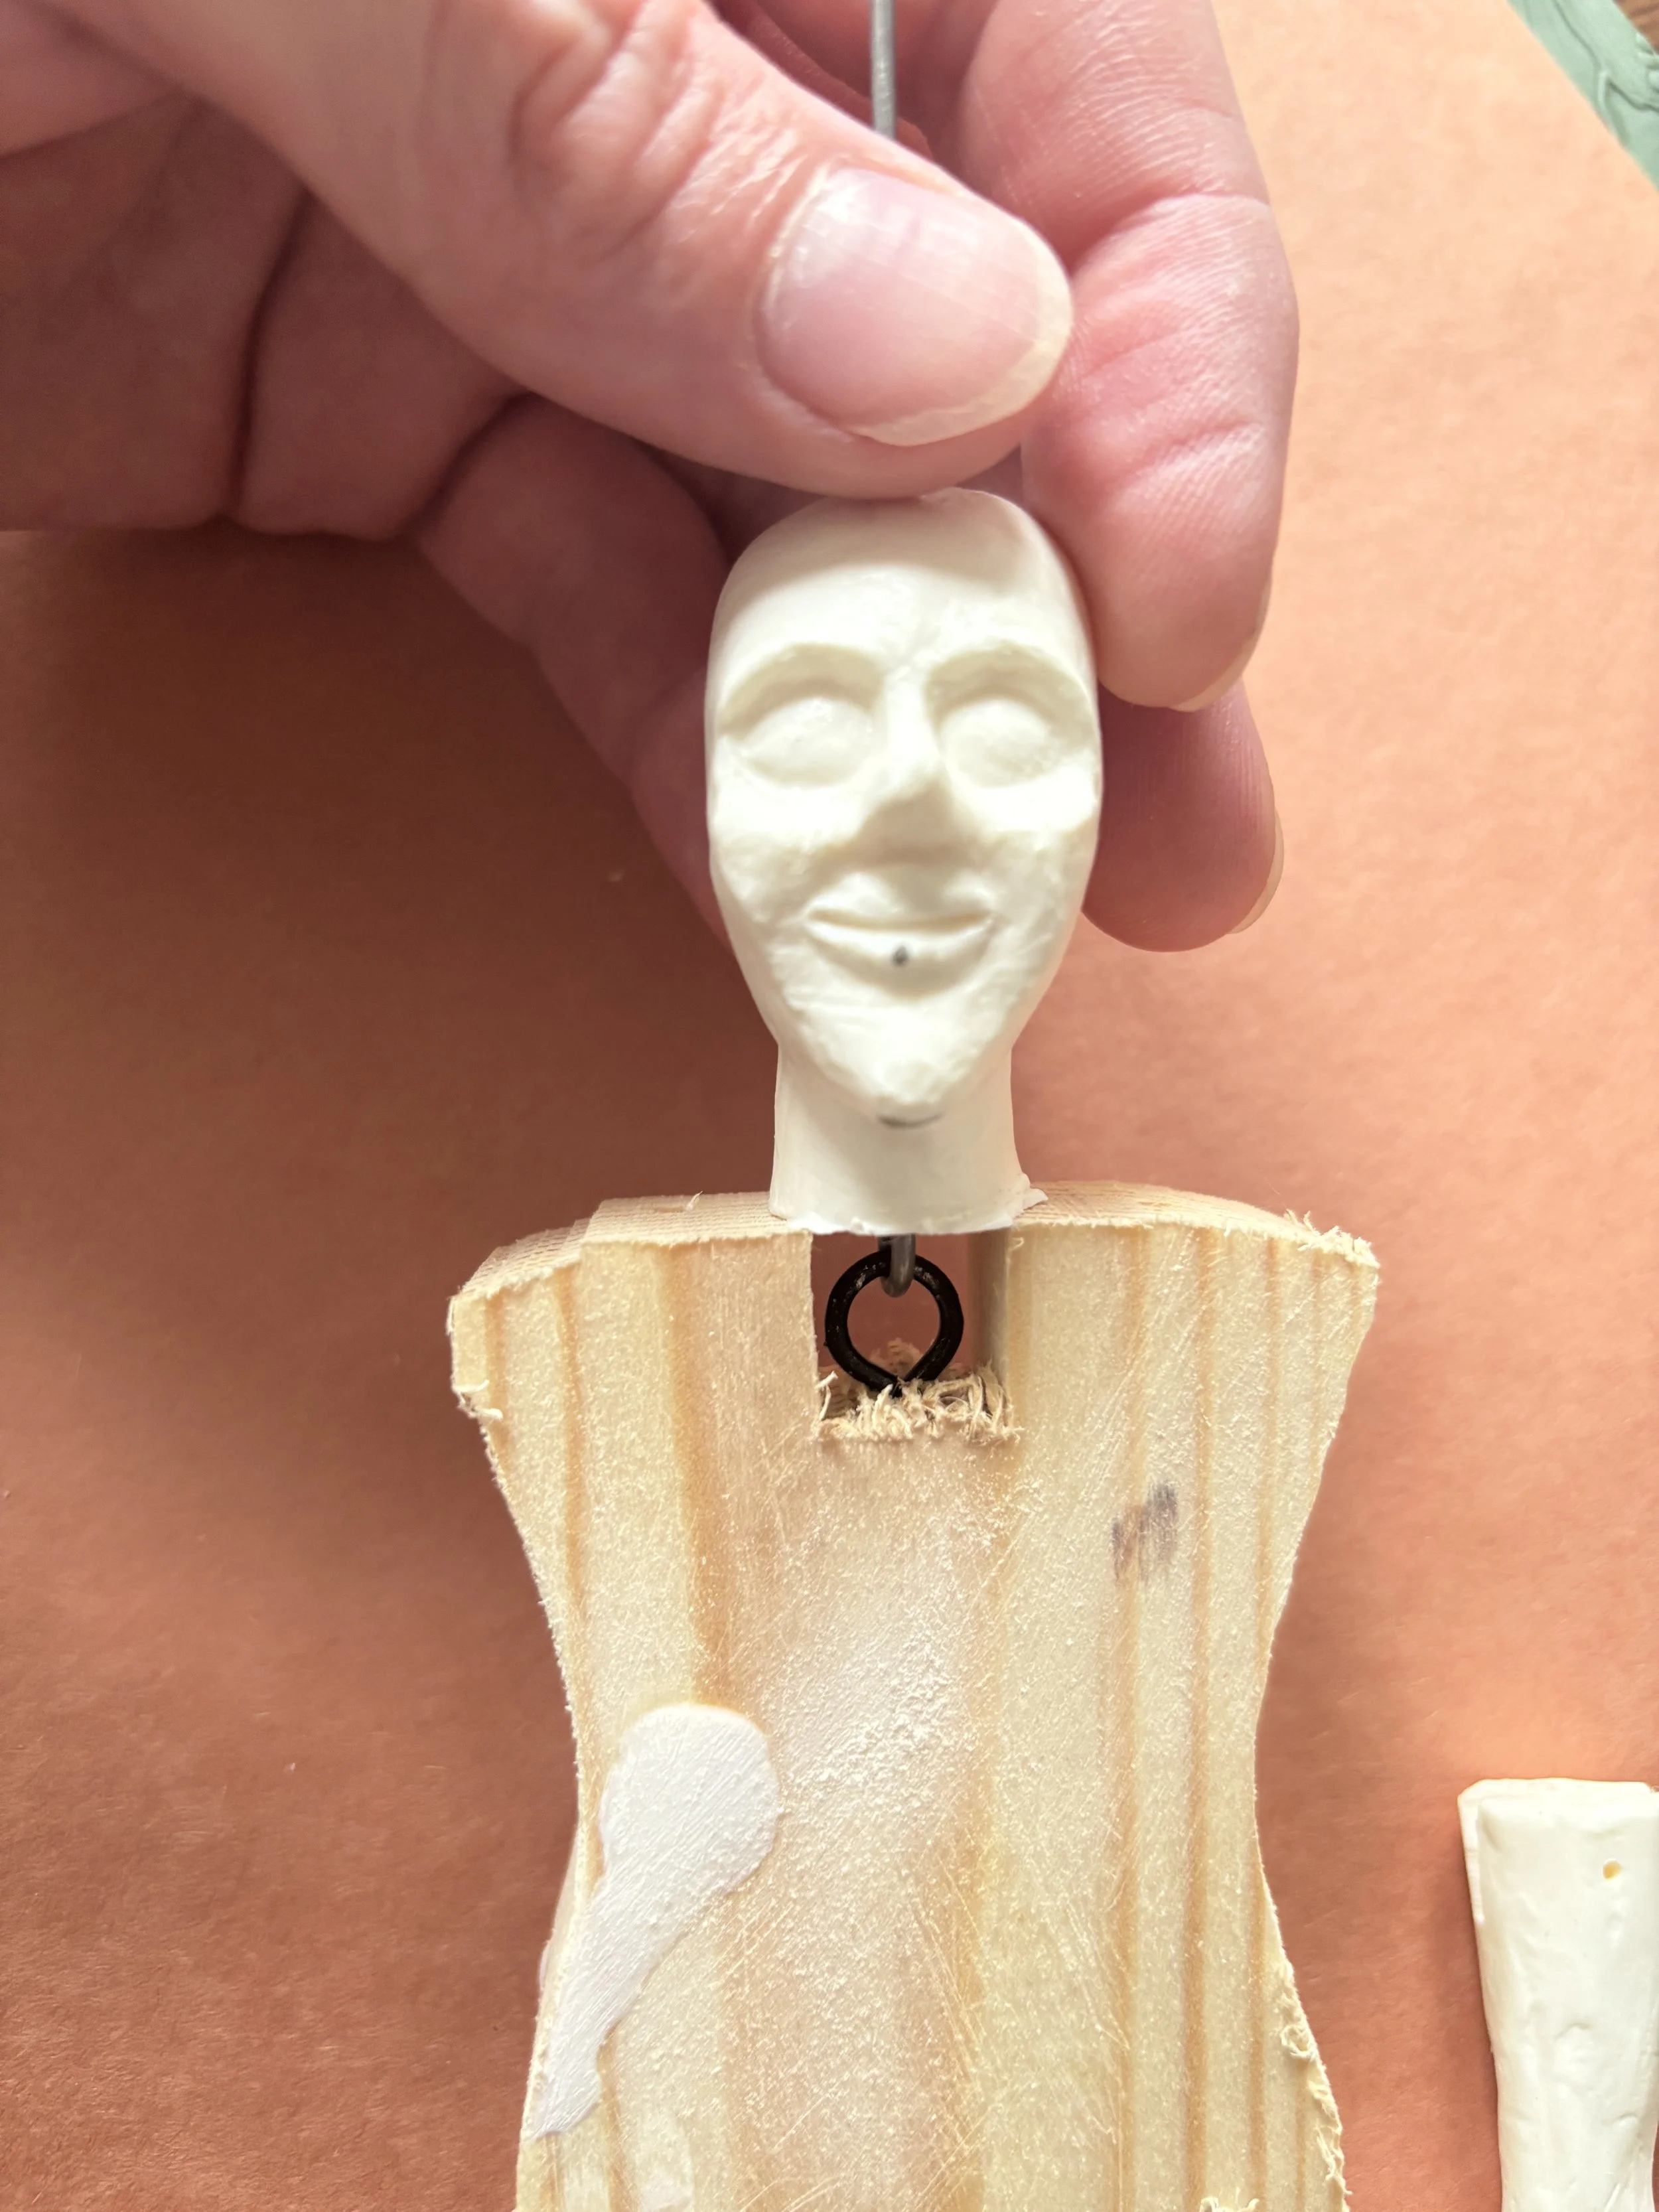
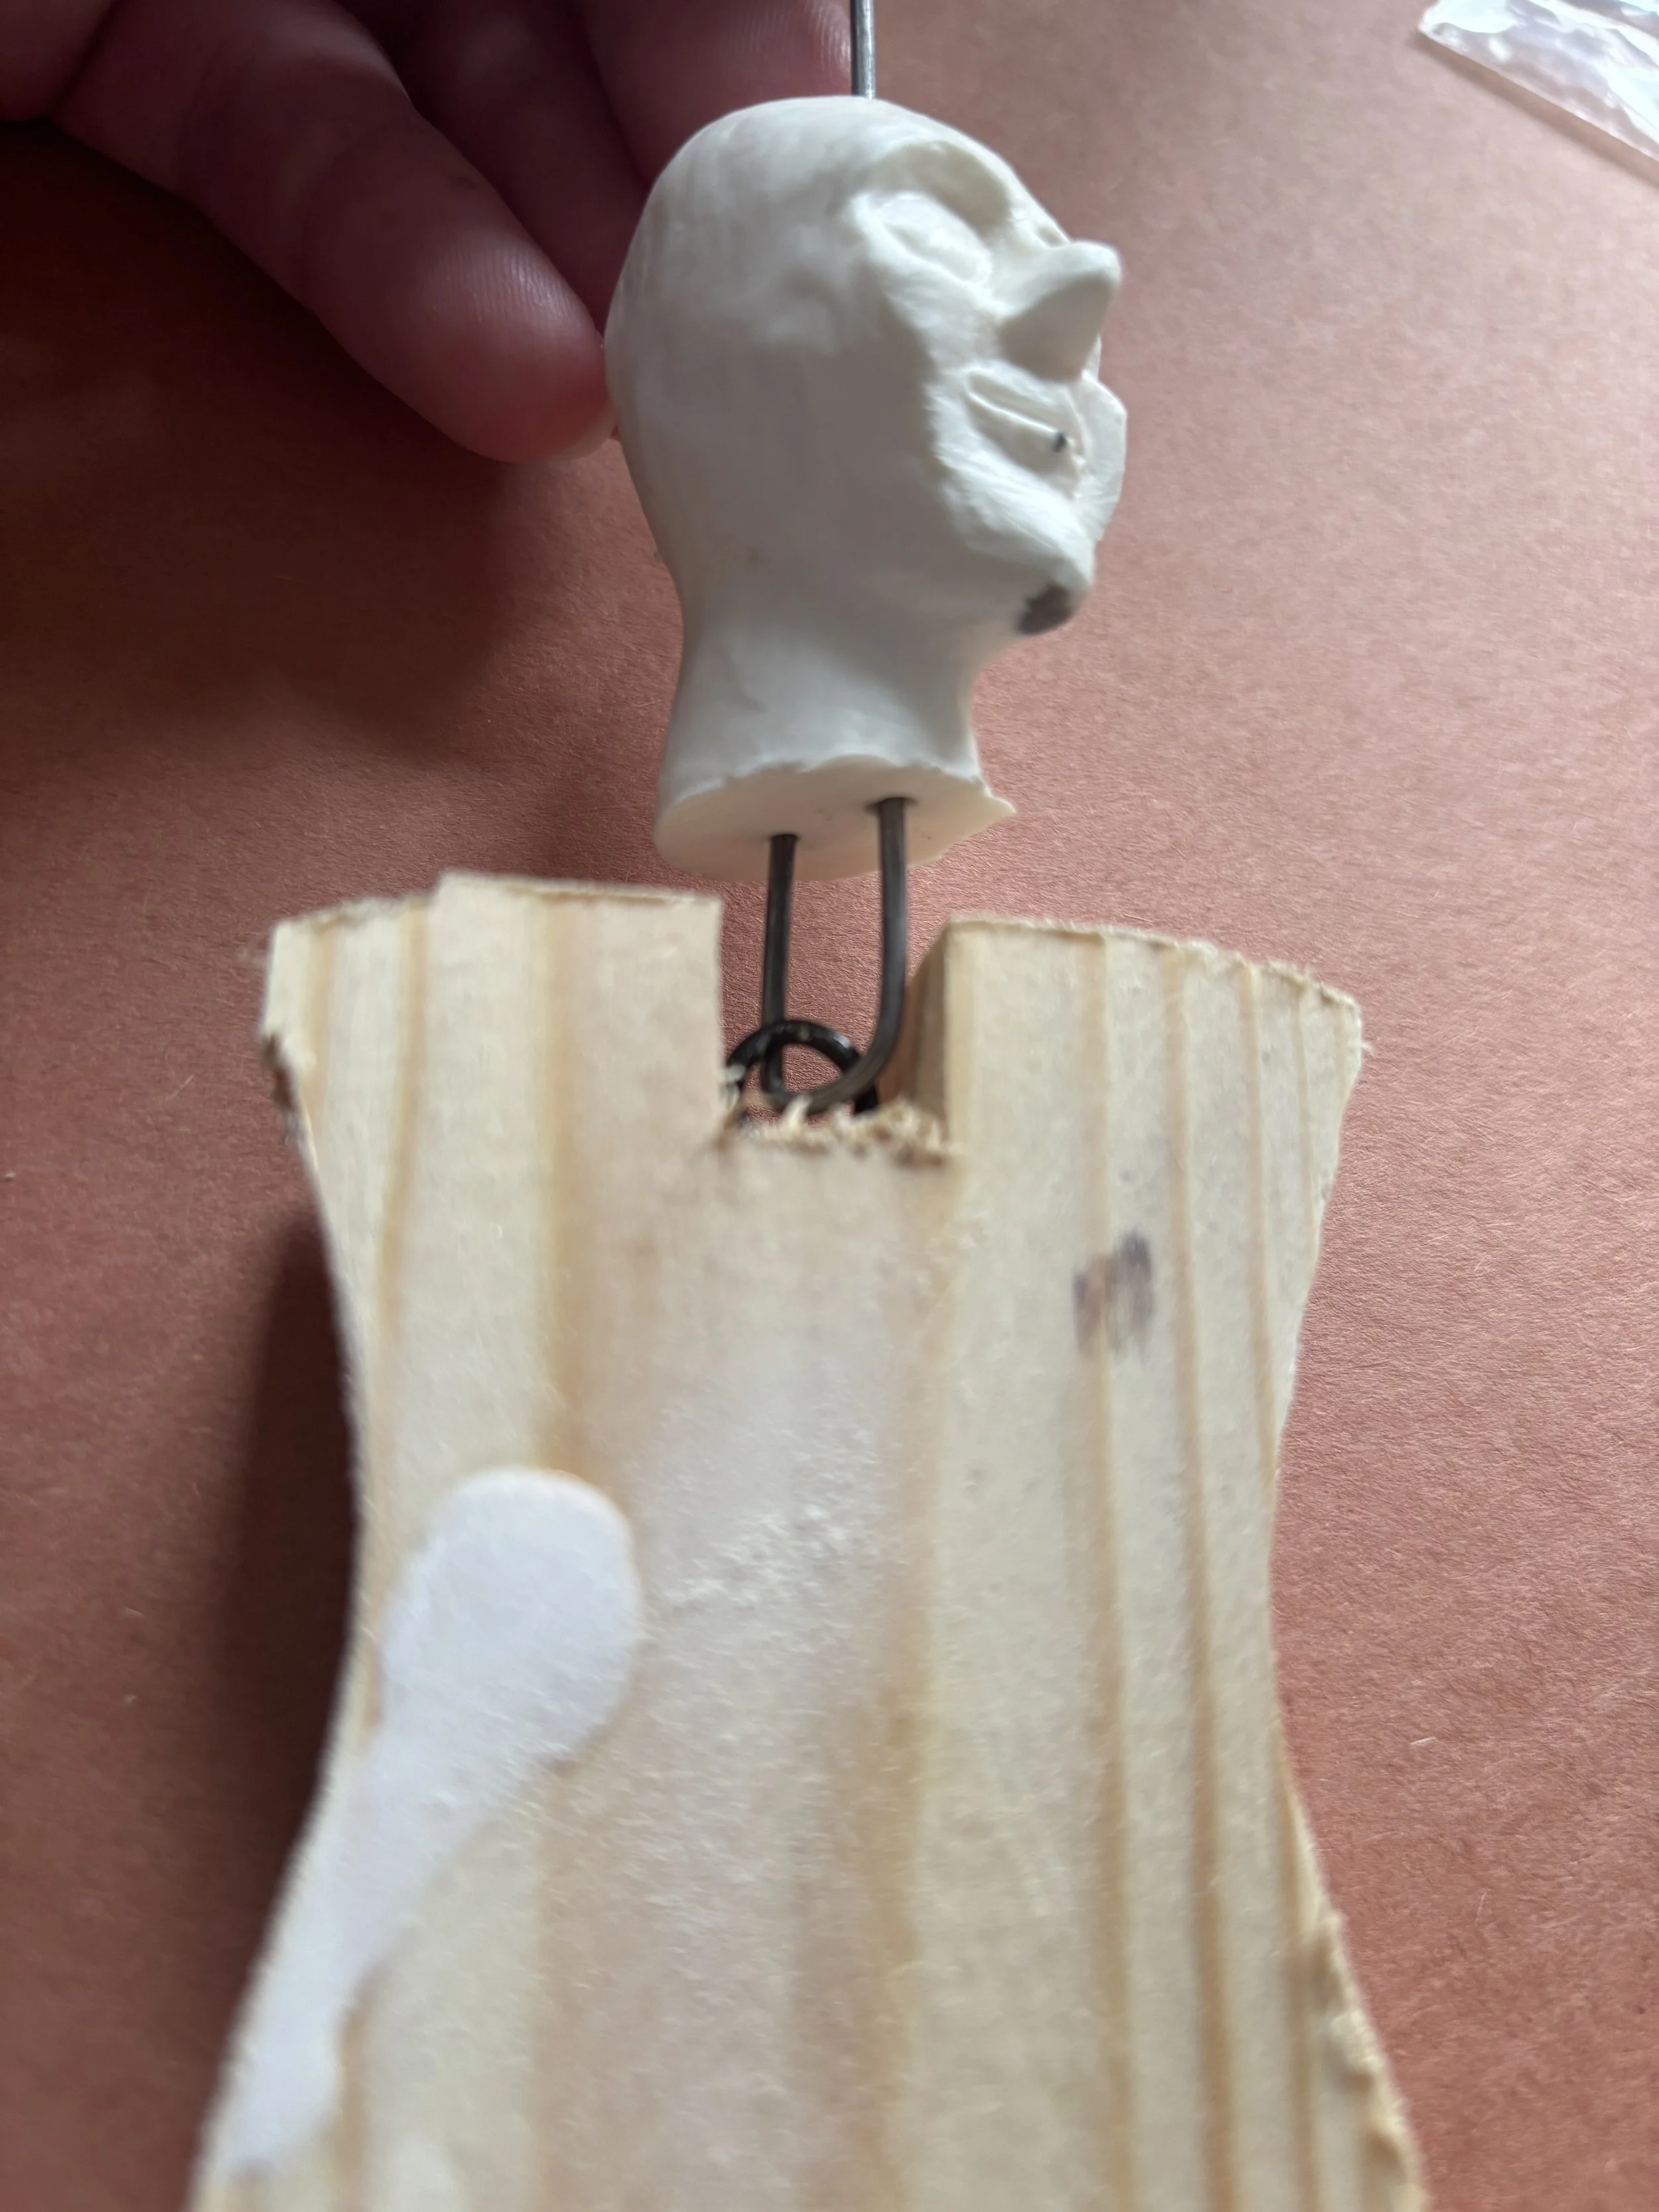
Your puppet’s head is already on the wire controller, all you need to do is put the body on.
Slide the bent portion at the bottom of the rod through the eye hook, and then push the head down the rod. There is a small hole drilled that lines up with the rod. Push the head all the way down to lock it in on the eye hook. You may need a pair of pliers to align to wire with the hole. Push down on the head until it “locks” into place against the body.
I tested these kits before boxing them up, the neck should sit flush against the “shoulders” or the wood body - unless you don’t want it to!
You can hold the wire in place with glue, or leave it unglued if you think you ever might want to disassemble.
DECORATE
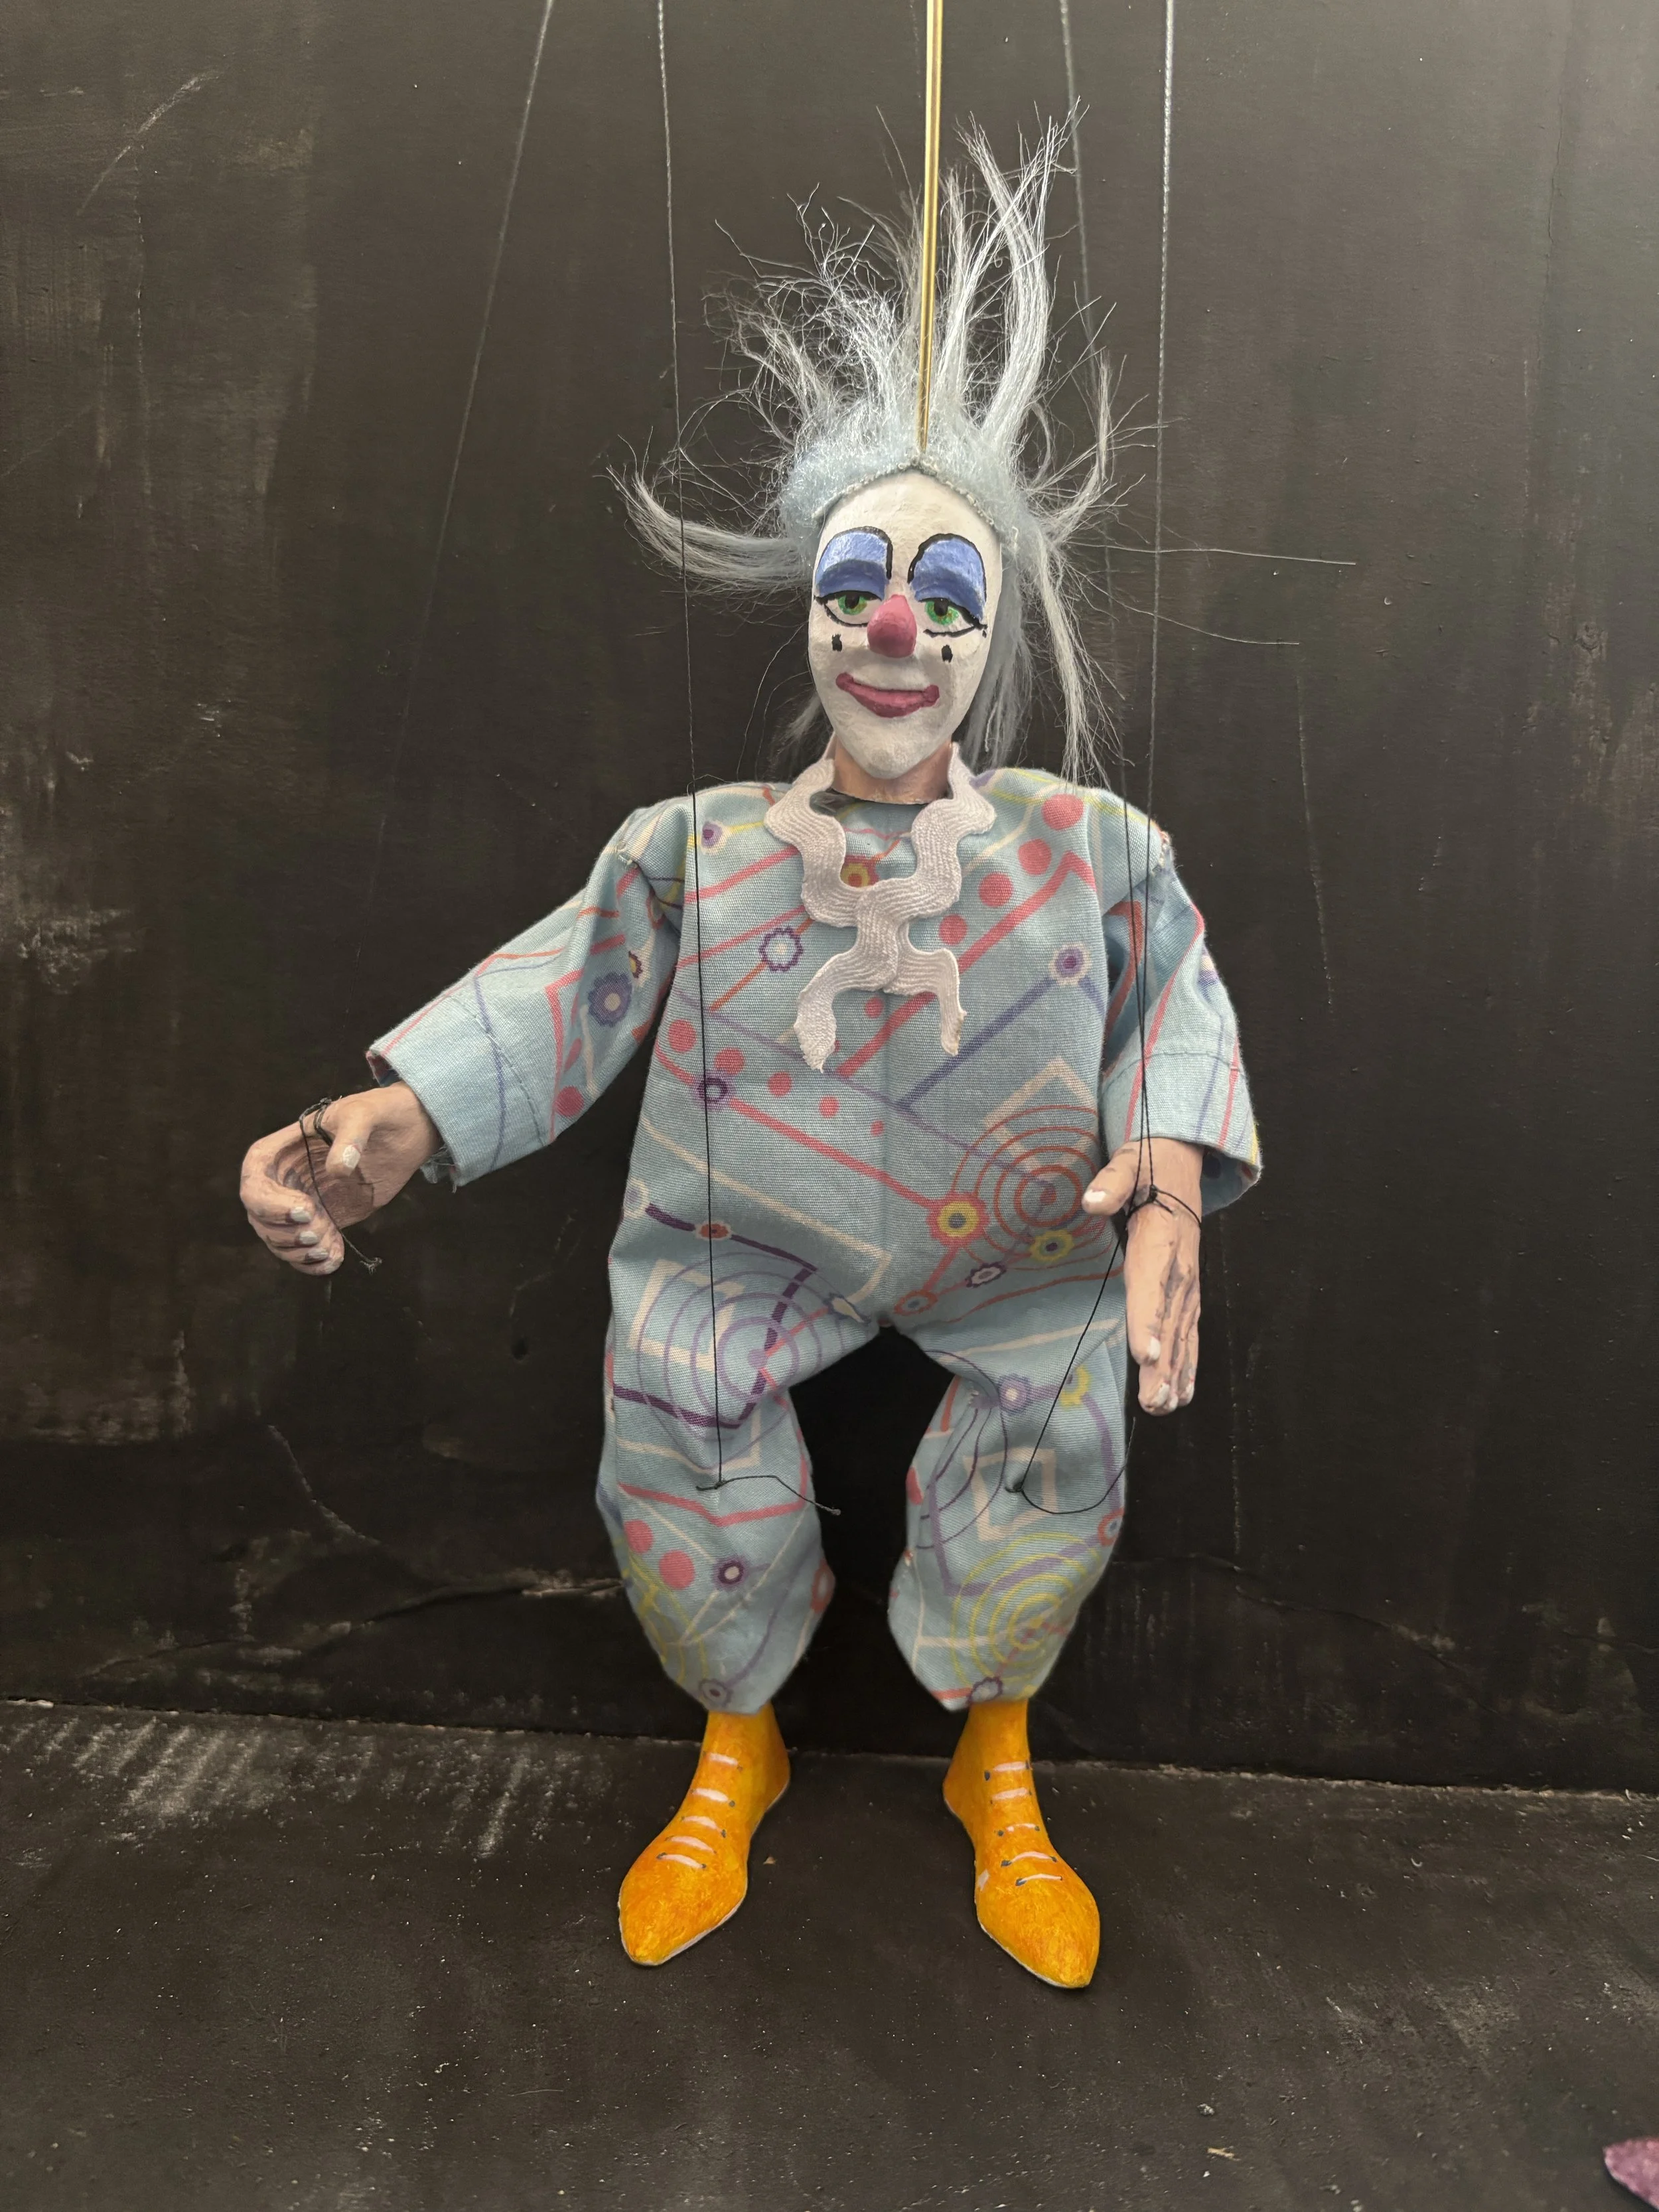
There are no rules when it comes to decorating your puppet. The plastic takes paint very well. You can drill into it, glue onto it (though I would recommend “roughing” the surface of the plastic if you are going to glue). Pom pom balls cut in half turn into whispy colorful hairs. Fine tip markers are great for tiny details. Perhaps a piece of glitter on a finger to resemble a ring? Go bold and shocking or realistic and gentle. This is your puppet!!!
I strongly recommend sealing the paint with some sort of sealer - paint can chip off with use. I personally kind of like the look of a well-loved puppet.
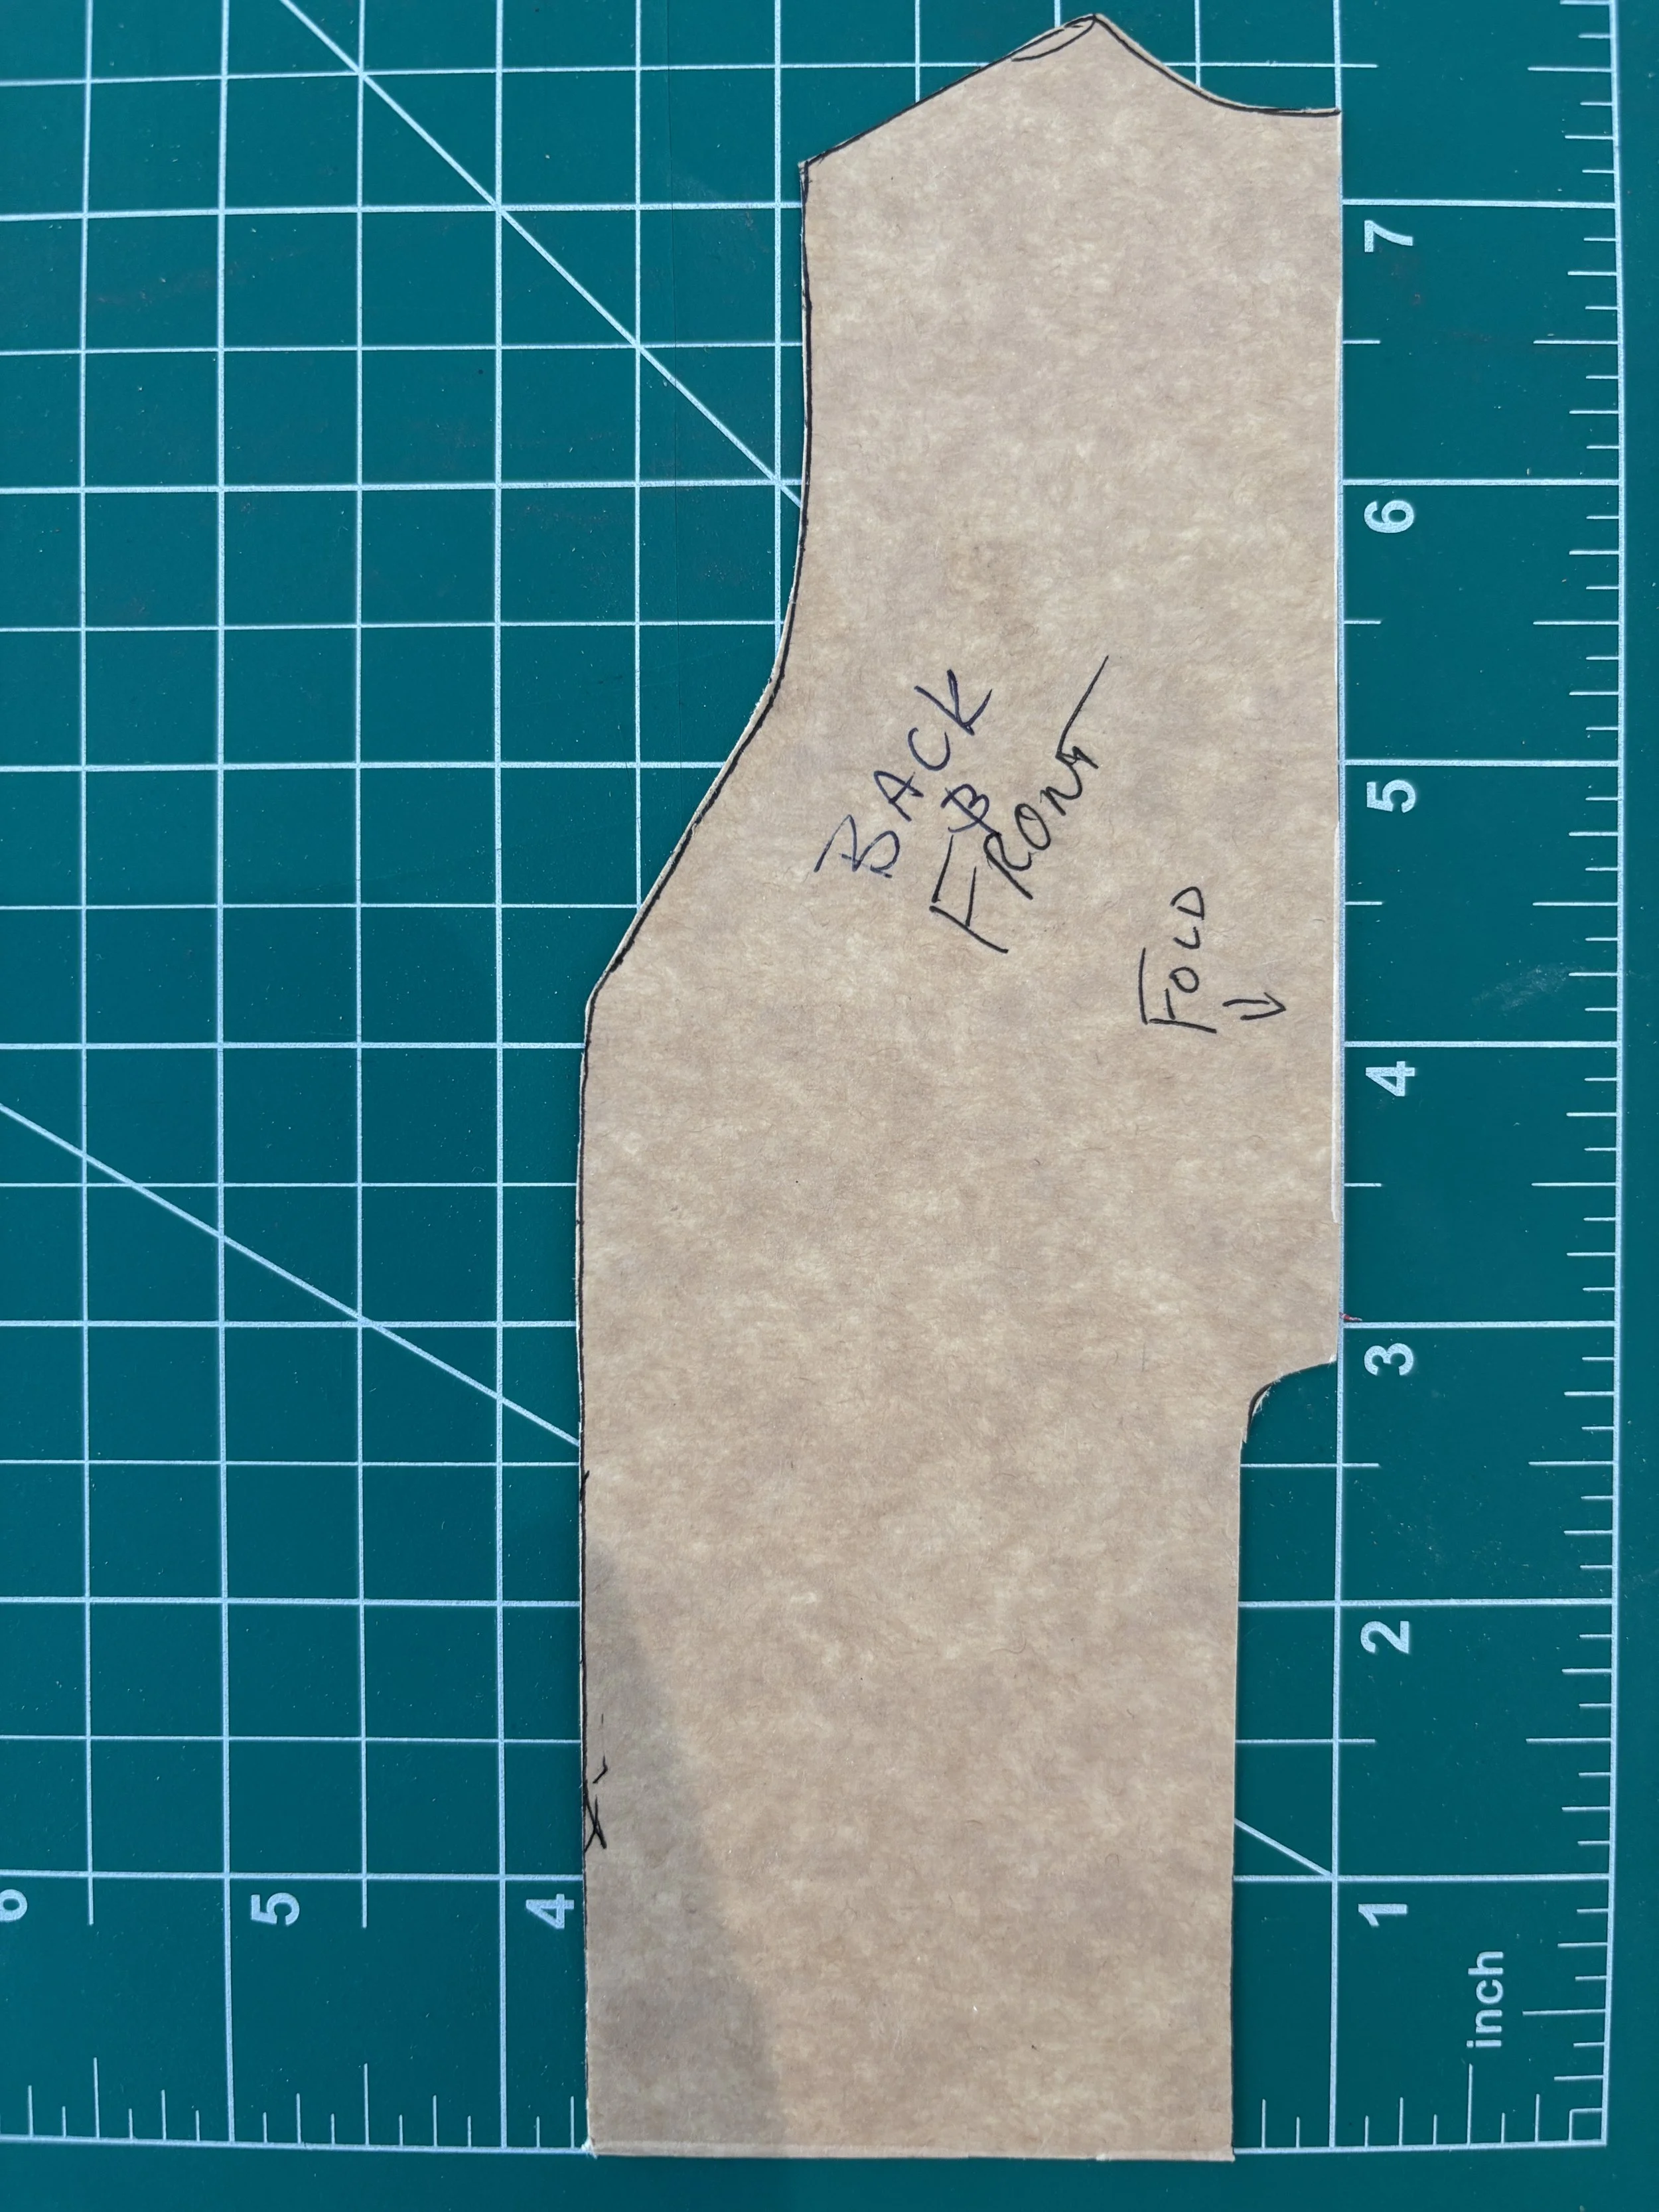
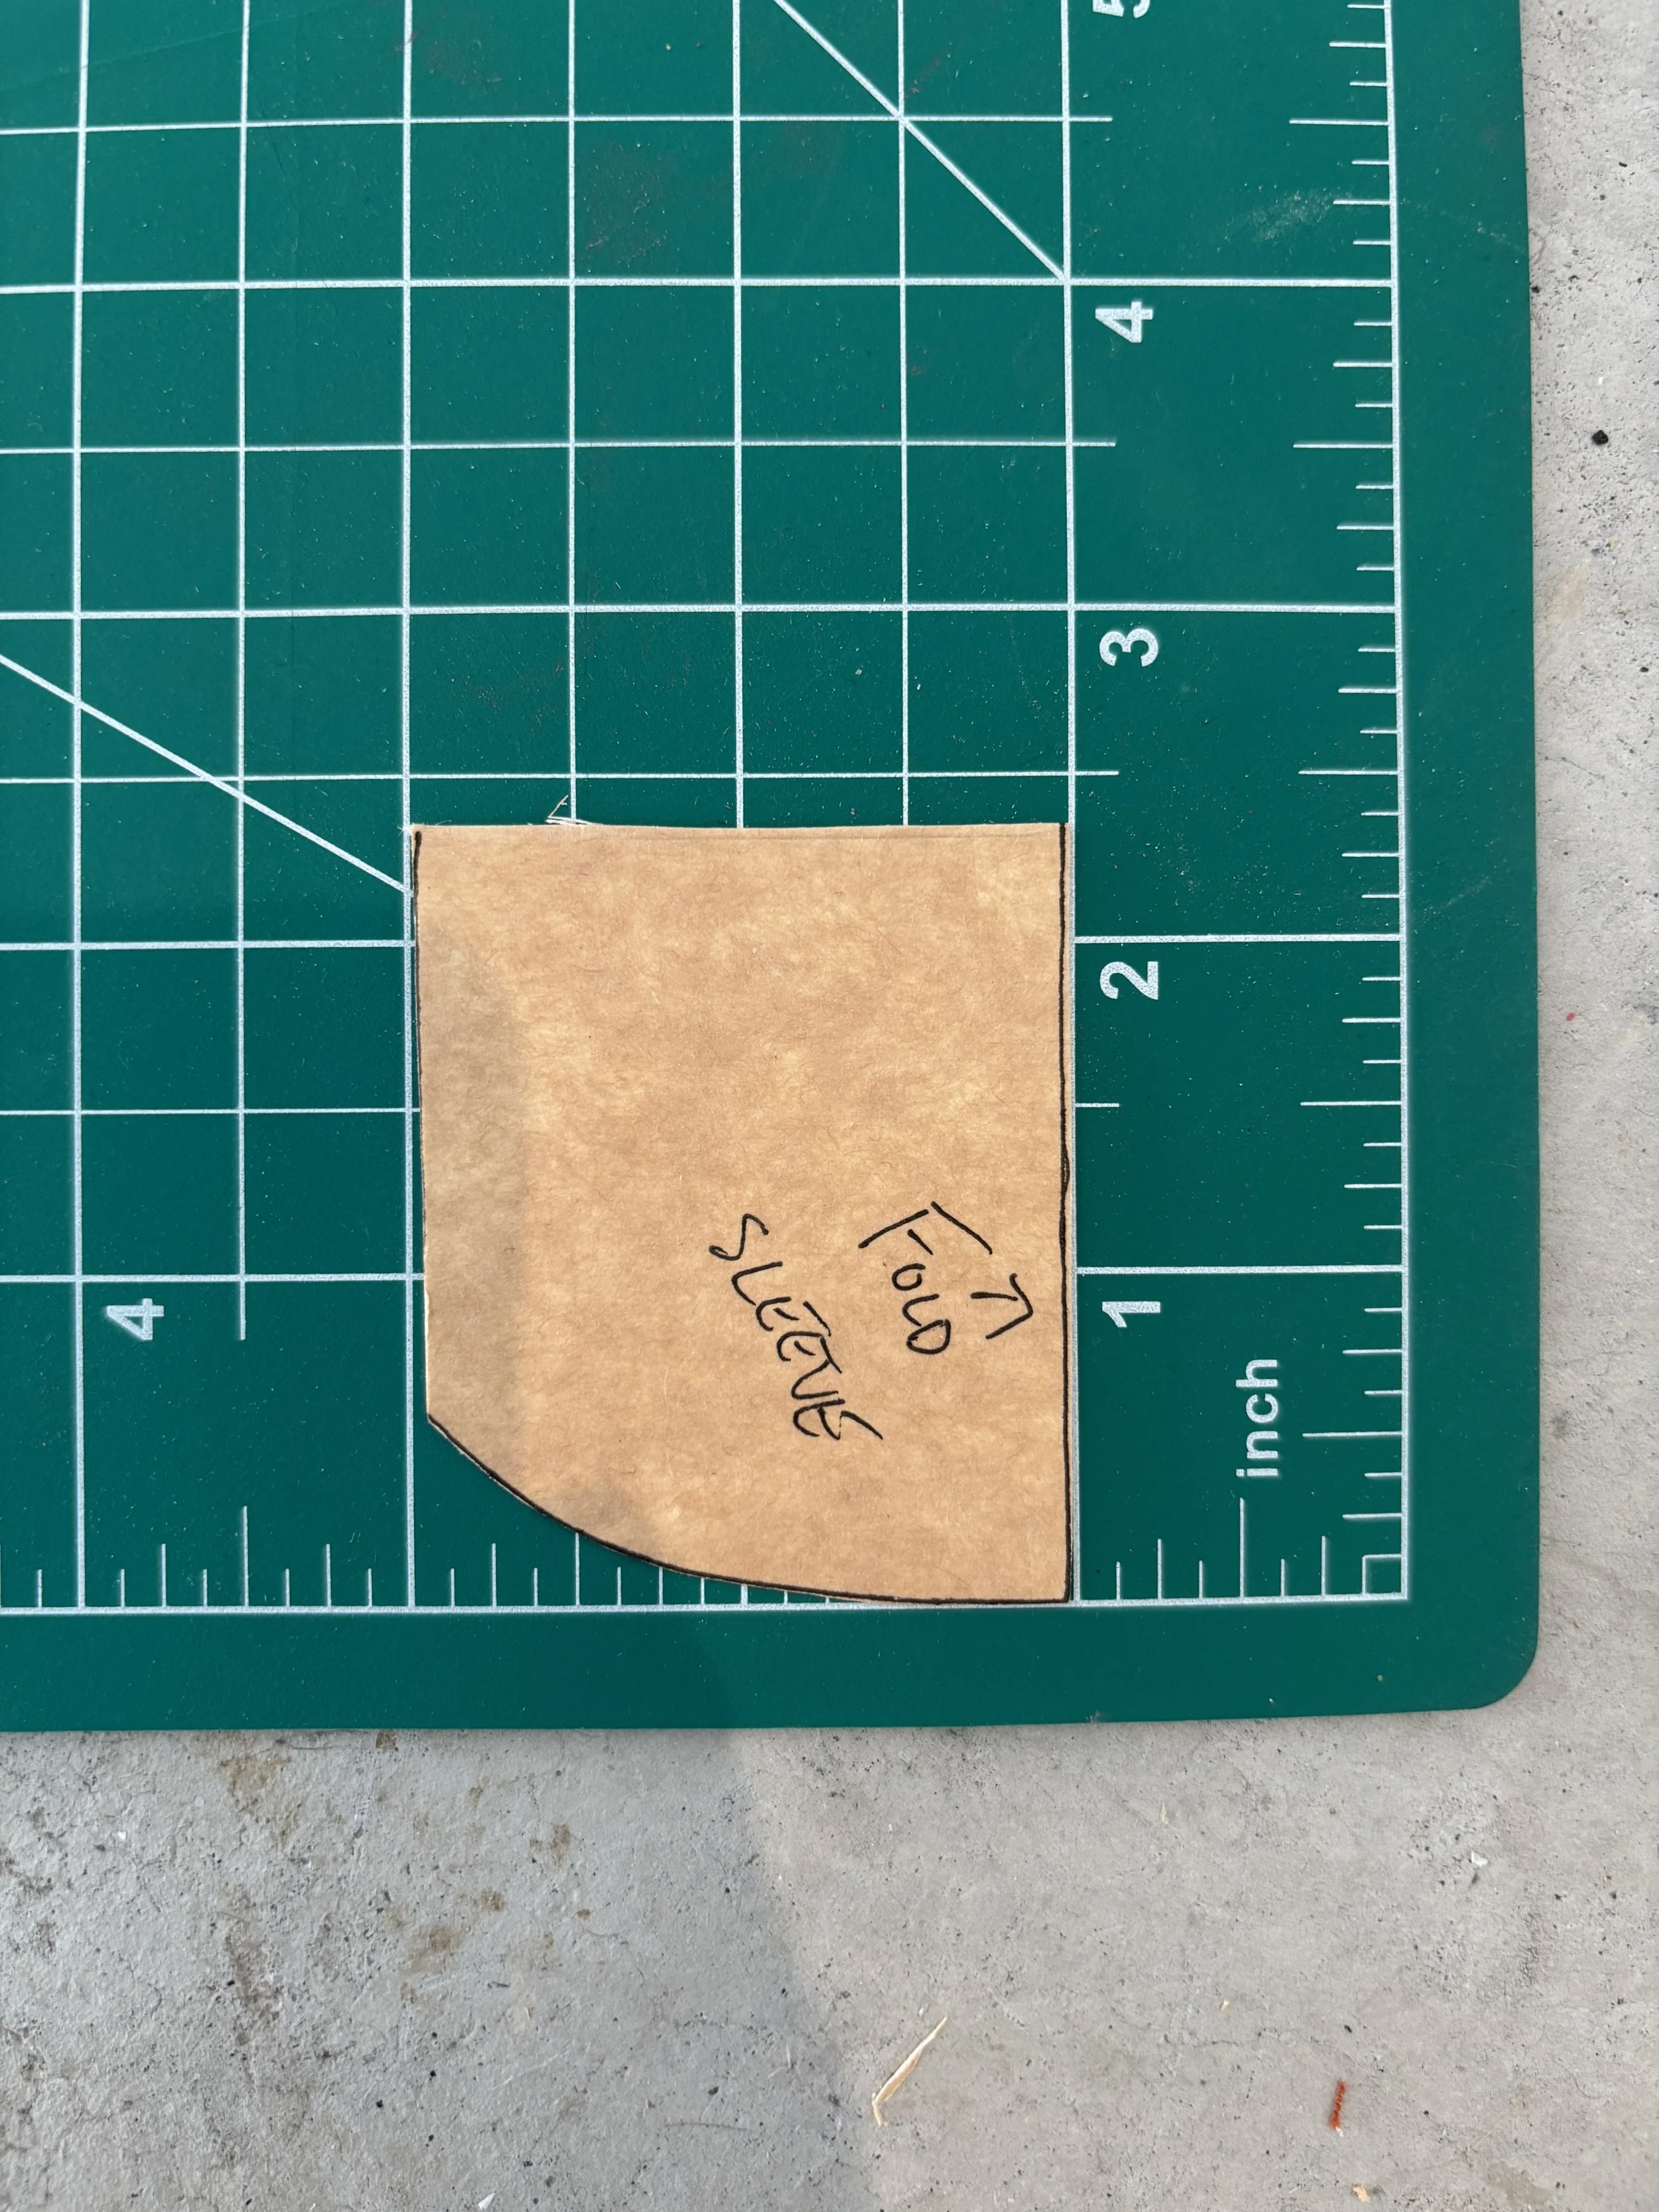
Dress them however you like. I have provided some patterns below to make a jumpsuit. Please note - I am not claiming to have any talent when it comes to textiles. The nice thing about puppets is that they aren’t made of flesh - you can just staple clothes to the body!
A puppet, once clothed, will usually move very differently than when it was not wearing any clothes!! It is surprising, so do not be shocked if movement seems different once the clothes are on. Some good best practices when it comes to clothes:
use light fabric that moves easily, not a rough fabric that is highly textured and likely to catch on itself
keep the clothes loose
review the statement above about tacking clothes directly onto the wooden body. This shortcut can save you a lot of time
the ladder stitch is very useful! If you use the patterns below to make a “jumpsuit” you will need to complete most of the jumpsuit, then put it on the puppet, and ladder stitch the back to sew the puppet into the costume
When you are happy with the way your puppet looks you can move on to….
Now it is time to bring them to life. This is the most exciting part. Take your thread and feed it through the loop on the puppet’s knee. Tie several knots, and hit it with a dab of glue. Make sure the line is long enough to reach the controller, plus ~4-6” of slack so you can tie it off when it is time. Repeat this step on the other leg.
Run the leg strings up to the control bar and thread them through the holes on the control. You will need to find the right tension in the strings. This can take some time, so be patient. If you have toothpicks on hand, they can be inserted into the holes to temporarily hold the string in place while you experiment with the tension.
The tension should be so that the legs are perfectly straight and perpendicular to the ground when the puppet is not being animated. Rocking the bar from side to side pulls the leg strings at the knee. Too little tension will result in a less than ideal walking motion, and too much tension will result in a very “uncomfortable” looking puppet at rest.
When you are happy with the tension, tie the string, hit the knot with a dab of glue, and you can even break off the toothpicks in the holes for an extra secure fit.
Now, on to the hands. I did not drill holes in the hands for the hand strings because they are not necessary, but they can be helpful. I am leaving this up to you. You can drill a hole through the hands and tie off the string, or you can tie a small loop around each thumb, or wrist, or finger… anywhere you want! A single string connects both hands and passes through the wire loop at the very top of the control.
That’s it! You’ve done it!! You have a new puppet and you are now a marionette maker and performer! Practice walking, waving, climbing.. explore with your puppet and see all that they can do!
If you want to send me pictures of your creations, I would love to see them! Email me or send to me on instagram @_puppetpants!